
11. Extras Menuadd chapter
11.1 Importing a License Fileadd section
This option is used for importing license files (*.liz) provided by ImageWare Components which will allow the unrestricted use of the BCS-2® software with all the chosen modules. Selecting this function will open a dialog window in which the license file is selected. If the license is valid a confirmation message will appear. Should this not be the case, a message why the license is not valid will appear.
11.2 Check Licenseadd section
This option informs you if a valid license exists for the BCS-2® version in use. For more information see the menu point About BCS-2®… in the Help menu.
11.3 Perform / Change Software Registrationadd section
In order for us to generate a license file for your system; we require your customer data and information about the system with which you wish to use the BCS-2® software. The Perform/ Change Software Registration… option launches a wizard that will guide you through the necessary steps. Thereafter you can register your BCS-2® installation online, alternatively it is possible to send a file which includes the needed data attached to an email or to print the form and send it via fax.
The individual steps of the online registration are described in the BCS-2® QuickStart, you will find the link to the QuickStart on your license certificate.
11.4 Language Selectionadd section
You can select the language you wish to use BCS-2® in with the Select Language option in the Extras menu. This way you can change the language of the program if needed. Some messages will however always appear in the installation language.
11.5 Web-Publisheradd section
Requirement BCS-2® Web Publisher Module The BCS-2® Web-Publisher including the FTP module allows the publishing of scan orders directly from BCS-2® into the Internet or the upload to an FTP server. Scan orders can also be deposited locally as a website. In this way scanned documents can be easily distributed, published and viewed by the recipient.
11.6 The Electronic Endorseradd section
The electronic endorser can blend text labels and/or images into scans. This option is useful for example if a company logo is to be added to images, or source certifications integrated into the scans. The information can be integrated into the image, or placed on a side. This function is not part of the basic BCS-2® version; it is only available if the electronic endorser was licensed.
 The endorser is activated/deactivated via Activate this Endorser in the Extras menu/Electronic endorser.. or by pressing the key combination CTRL + E.
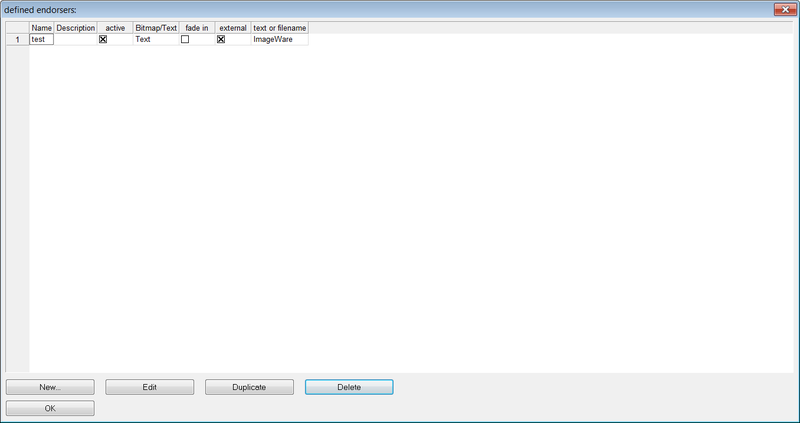
Upon selecting the menu item Electronic Endorser… a dialog window displaying a list of all configured endorsers opens. In this list you can, by using the corresponding buttons, create (New), Edit, Duplicate and Delete electronic endorsers, it is also possible to activate an electronic endorser directly in the list.
11.6.1 Creating and Editing Electronic Endorsers
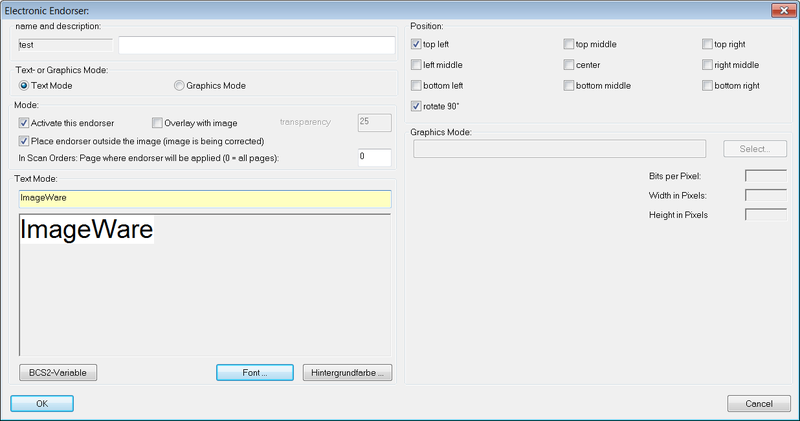
Create a new Endorser by selecting the New button, then enter the name of the new endorser in the appearing dialog window, upon confirmation of the name with OK the window in which the endorser can be configured appears, this window will also open if you select an existing endorser from the list and press the Edit button. The window contains the following areas/sections with options:
- Name and description
- A short description can be entered here.
- Text- or Graphics Mode
- Differentiate between text- or graphic-mode.
- Mode
Activate the current endorser by selecting the Activate this endorser option, the endorsers can also be activated in the Defined Endorsers list. Furthermore you can select:
- Overlay with image the endorser is then blended into the images, if this is the case the transparency of the endorser can also be defined, by default the value is 25.
- Place endorser outside the image the endorser is added to the sides of the images.
- In Scan Orders: Page where endorser will be applied (0= all pages) , select if the endorser is to be added to all or only specific pages of an order.
Text Mode
The text that will blend into the image can be defined here; a preview will be displayed in the box beneath. It is possible to use BCS-2 variables for the text and to change font and background color, simply select the corresponding button.
Position
Determines the position of the endorser. Following positions are possible:
- top left, middle and right
- left middle, center, right middle
- bottom left, middle and right
- Rotate 90°, the text/graphic is rotated by 90 degrees to the left before it is added to the image.
Graphic Mode
The image file (JPEG, TIFF, PNG and GIF) can be selected here. A preview of the selected image as well as the image information bits per pixel, height and width in pixel will be displayed.
Please note: Images, to which an electronic endorser has been added, might differentiate from the original image. Depending on the position and size of the endorser images may be distorted or compressed.
11.6.2 Duplicating Endorsers
Select the desired electronic endorser from the list and press the Duplicate button, the duplicated endorser will be added to the end of the list.
11.6.3 Delete Endorsers
To delete an electronic endorser select the endorser with a left click in from the list, thereby marking it then press the Delete button, the endorser will be deleted after the appearing query was confirmed.