
7. Order Menuadd chapter
7.1 Order Menu Basic Functionsadd section
Create…
Creates a new scan order
Close Current and Create New Order
Closes current order and creates a new order of the same order-type.
Select…
Opens the Order Window with the Order List. Here orders can be selected for processing.
Import Image Files…
Imports all JPEG and TIFF files from a folder into the current order. This function isn´t available in the basic version. Prerequisite is the Import Module.
Options…
Opens the option dialog window
Set Barcode Position…
Starts the process to define barcode positions on the cover sheet of an order. This function isn´t available in the basic version. Prerequisite is the Barcode Module.
Edit Order Indexes…
Enables post editing of order indexes of the current order.
Edit Order Long-Text…
Enables the editing of a descriptive text for the order with an internal editor. The long-text of an order, for example a summarized description of the current order, has no length limit and is written into the order.sum file upon transfer. The order long-text corresponds to the value of the BCS-2®variable ORDER_TEXT .
In addition to the order long-text a page long-text can be added to each page of an order, for example to describe each image individually. Press the SHIFT + Space key combination to open the internal editor with which the page long-text for the current image can be edited. This function cannot be accessed via the Order menu. The page long-texts are also written into the order.sum file upon transfer.
Information about the Order…
An overview of the current order is displayed, containing Order-Type, order number, number of pages, date of last update and size. Also, the old order number and creation date are displayed if the order has been imported.
Display QC window in scan order
An additional smaller Image viewer is displayed in open orders if this option is selected. The “Quality Control” window allows you to select and zoom into a specific section of a scan area, e.g. the book fold or to view the complete image if you prefer to look at the 1:1 display or zoom in the larger Image viewer, thereby enabling two different views of a scan.
Rearrange Pages, Left Pages First
Requirement for this function is an even number of pages within the order, and that all right-hand pages were scanned before the left-hand pages..
After performing this operation, which needs to be confirmed, all pages will subsequently be collated in the correct order.
Caution: This operation can only be performed once per order, and cannot be reversed.
Rearrange Pages, Right Pages First
see above
7.2 Pagination Functionsadd section
Pagination functions (page organization of a scan order) are managed in the Pagination section in the Order menu:
Up/Down One Level
Increases or decreases the pagination level of the image selected in the thumbnail list.
Reset All Levels
Resets all pagination levels of the current order.
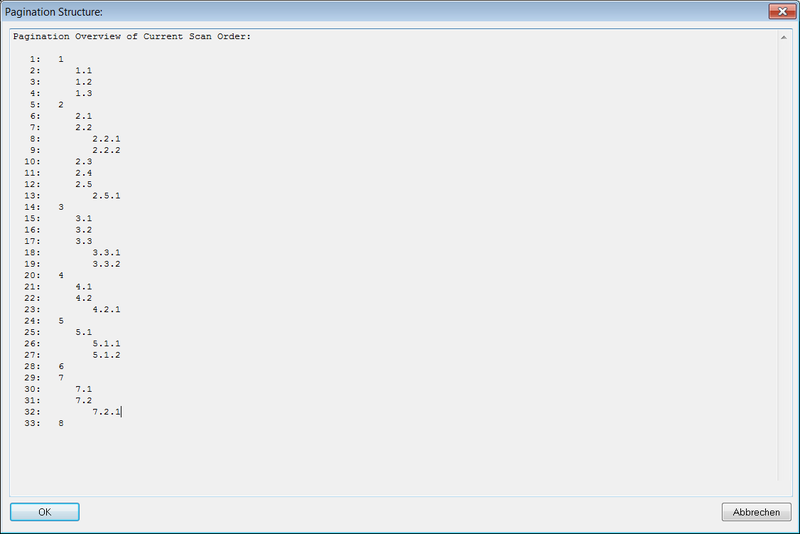
Show Current Structure…
Opens an overview window, displaying the organization (pagination) of the current order.
In this window (screenshot) the pagination levels can conveniently be increased or decreased by pressing the + and – keys. The desired page needs to be selected from the list with a left-click
The setting of the number type of the organization level can be defined in the options dialog window wich is accessible via the Pagination button
7.3 Binarizationadd section
Selecting the Binarization settings opens a dialog window on the right side of the screen in which the settings for the binarization can be adjusted.
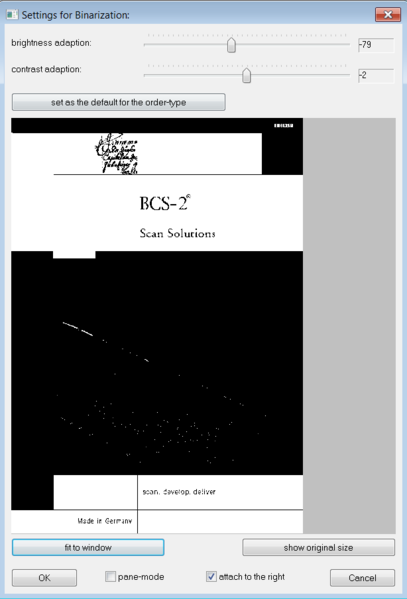
A preview of the outcome is displayed directly in the dialog window. The Image viewer within the dialog window can be adjusted to display the image fit to window or to show original size which will display the image in its original size (1:1), simply select the appropriate button or zoom into the image by marking a section.
Brightness and contrast can be adjusted by using the two sliders above the viewer.
If you are satisfied with the outcome of the binarization, save the settings by exiting the window over OK, or save them as a default for the order type by pressing set as the default for the order type button beneath the sliders.
The Binarization window can be positioned anywhere in the window, by deactivating attach to right and activating the pane-mode.
7.4 Virtual Splitting/ Maskingadd section
If the option do not perform splitting/masking, only store setting was activated in the general settings of the order mode which can be accessed via the menu item Options… in the Order menu, the menu items Set current virtual splitting/masking for ALL pages or Remove virtual splitting/masking from ALL pages are activated.
Set current virtual splitting/masking for ALL pages
The mask/splitting line of the current page is applied to all pages in the order,when the appearing query is confirmed with Yes. Size and position of the mask/splitting line will be corresponding to the current page.
Remove virtual splitting/masking from ALL pages
Removes the mask/splitting line from all pages if the confirmation request is confirmed with Yes.
The mask/splitting lines are also displayed in the thumbnails after an image was viewed. Please note, that the position of the mask/splitting can only be adjusted for all images not for single images, should this be required please use multi-masking.