
2. Scanner Settingsadd chapter
The Scanner Settings tab is used to manage scanners and BCS-2’s default interaction with scanners. The scanner settings are done in the BCS-2 application, if a BCS-2 plugin for scanners is use. You will find further information in the respective scanner chapter.
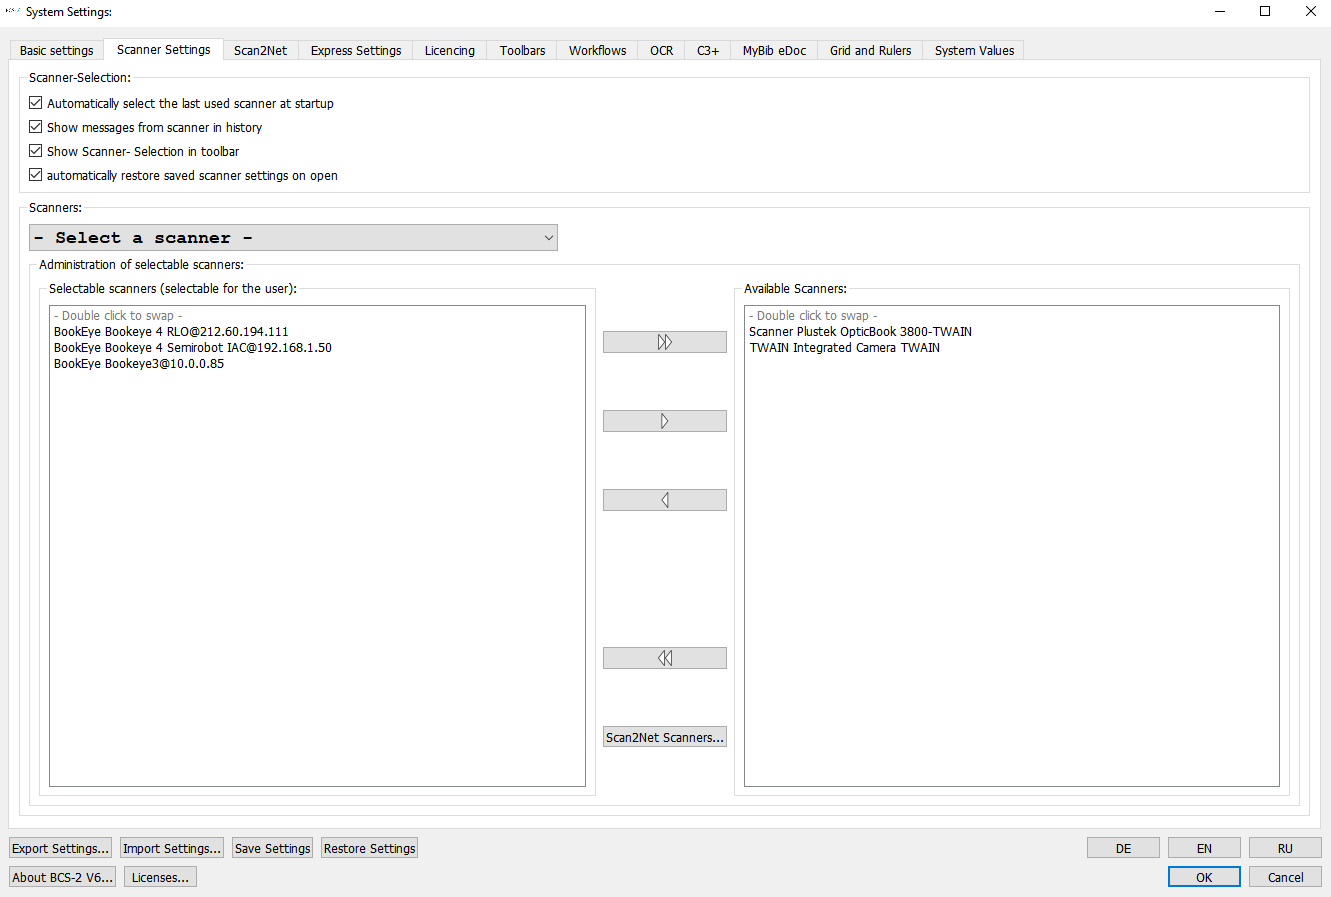
2.1 Selection Scanneradd section
Automatically open last opened scanner at startup:
If this option is activated, BCS-2 tries to address the last used scanner directly at the start.
Display the scanner message in the history:
The messages from the scanner are displayed below the BCS-2 application if this option is activated.
Display scanner selection in the toolbar:
The deposited scanners can be selected via the toolbar in the application. Activate this function only if you want to control several scanners via BCS-2 and you have the corresponding toolbar icons for this function.
Automatically open saved scanner settings at the start:BCS-2 checks at startup or when selecting a scanner whether settings have been saved for the corresponding scanner and loads them automatically.
2.2 Edit Scanner Selection Listadd section
The drop-down tab: Please select scaner, allows you to select a scanner from the Selectable Scanners list for use. If the Show scanner selection in toolbar is not activated, this is the scanner that is always addressed by BCS-2.
2.2.1 Add Scanner to Selection
In the right column, BCS-2 automatically displays all scanners available at that time that are available via TWAIN or a plug-in.
Scanners that must be connected via a network connection before they appear in the list can first be created using the Add Network Scanner dialog.
To add a scanner to the Selectable Scanners list, it must be selected in the right column and can then be transferred to the left column either by using the arrow keys or by double-clicking. In this way, scanners can also be removed from the list.
![]()
![]()
If all scanners shall be moved from one column to the other column, the double arrow buttons can be used.
2.2.2 Add network scanner
The Add Network Scanner button opens the dialog for managing the network scanners.
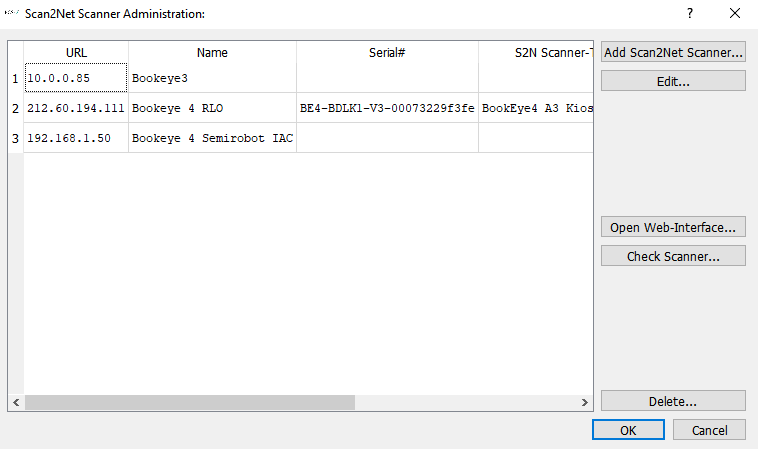
All configured network scanners are displayed in the overview list on the left. The following scanner information is provided if the scanner has already been checked by BCS-2:
- URL: IP address of the scanner
- Name: Logical name of the scanner.
- Serial number: Serial number of the scanner.
- Scanner type: Official scanner designation
- Description: Optional description
The Add button on the right-hand side of the administration dialog opens the dialog for scanner acquisition.
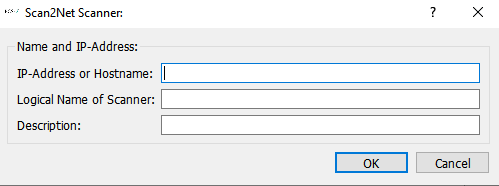
In this dialog, the following information is entered for the respective scanner:
- IP address or the host name: IP address of the scanner
- Logical name of the scanner: The name is then displayed together with the IP address in the scanner drop-down list.
- Description: An optional description can be stored.
By closing the dialog with Ok the new scanner will be displayed in the Scanner Administration.
Check/edit scanner
In order to check a scanner or edit it again, it must first be selected and marked in the overview list of the administration dialog.
Click the Edit button to open the Scanner Capture dialog (see above) in which the stored information can be adjusted or corrected.
Via the button Check scanner the inputs and the connection of the respective scanner can be tested. When checking the scanner, BCS-2 fetches additional scanner information such as serial number and serial type and makes them available in the overview list.
After closing the scanner management dialog via OK, the configured network scanners are listed in the list of available scanners and can be added to the list of selectable scanners.
Translated with www.DeepL.com/Translator