3. BCS-2 Express Application Sonyadd chapter
Once you have configured all the settings in the BCS-2 Express Converter, start the BCS-2 Express application using the “BCS-2 Express” icon.
Now press the green start button or one of the function keys on the scanner (grayscale, black/white, or color) to access the scanning interface.
3.1 Adjusting Interface Layoutadd section
The layout of the toolbars can be customized. Optimize the layout for your screen and save the layout using the key combination “Ctrl (hold) N9150*.” The “Save Current Configuration” dialog box will appear, which you must confirm with OK. This layout is now saved as the default and will be called up for each new job.
3.2 Adjusting Camera Settingsadd section
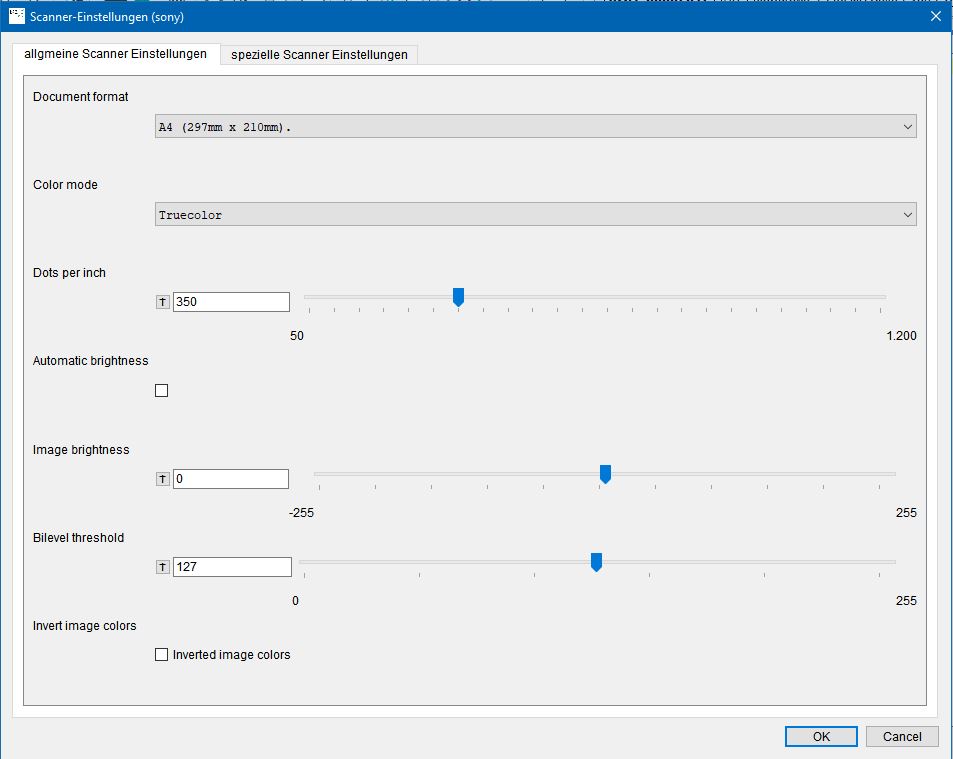
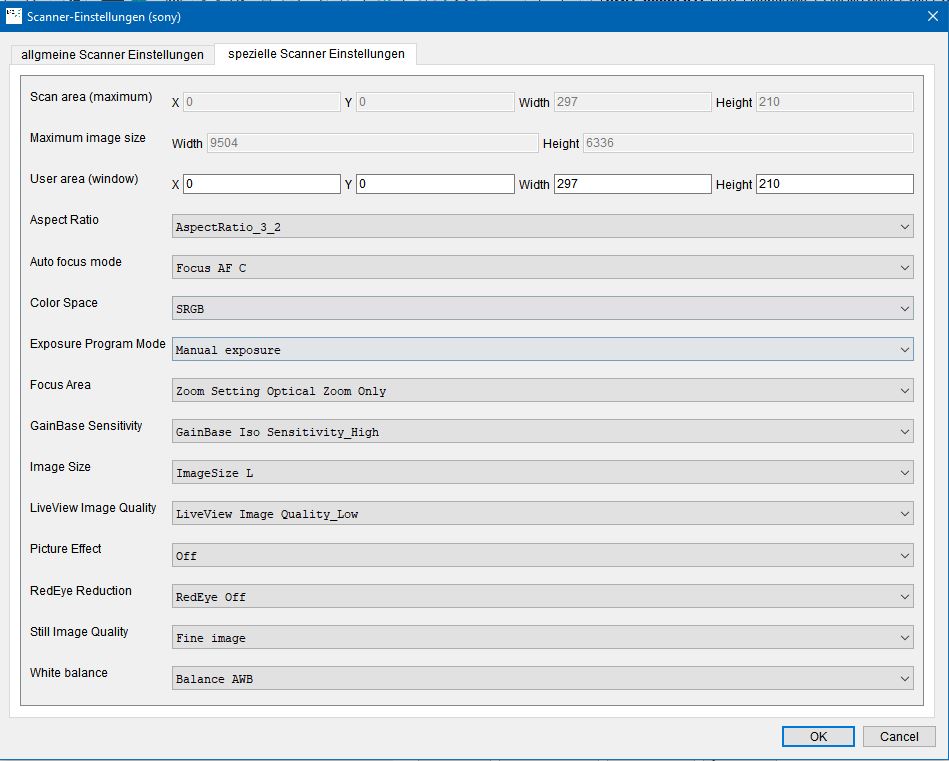
The default value is 300 dpi black and white. If you would like to assign other default values, you can do so by selecting the corresponding function button. The scanner settings can be accessed by pressing and holding the Ctrl key N9153.
All available settings, such as exposure time, color value adjustment, etc., can be changed depending on the connected camera. To save the new settings, press and hold the Ctrl key N9151. If you are not satisfied with the new settings, you can return to the default settings by pressing and holding the Ctrl key (N9152) provided you have not restarted the application.
If you have mounted the camera on a tripod or stand, you can save the focus and lens settings in Live View mode (CTRL+L) (if your camera supports Live View) by pressing and holding the Ctrl key (N9151). Close the window with “OK” when you are finished.
BCS-2 Express is now fully configured and ready for use.
BCS-2 Express is now fully configured and ready to use.
Camera Settings Sony