8. Configurationadd chapter
8.1 How can I change the file and image names?add section
If you want to use individual file names you must change the workflow. This is where you define the names of the folder and images, that will be automatically applied when you use the button “transfer job”.
To change the workflow please start the BCS-2 Configurator, then
- Select the tab workflows
- Select the according Workflow which you are using (the workflow is highlighted)
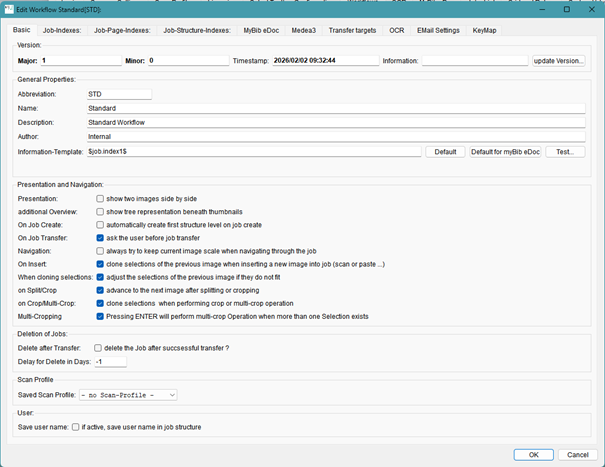
- Open the Workflow dialog via double click or the button “edit”
- Check if the Basic settings for the presentation and navigation of the workflow are correct
- Now select the tab Job Index
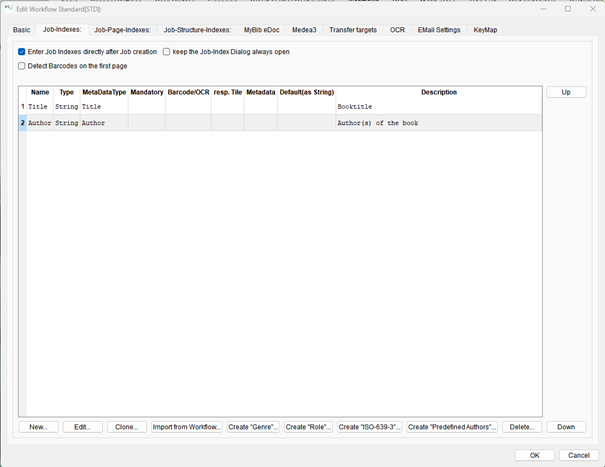
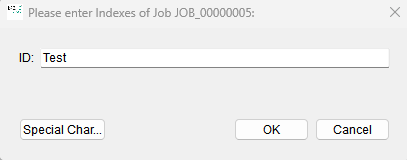
- Activate “Enter Job indexes directly after job creation”
- Edit or delete the existing indexes and define the Job index in which the name, that is to be used for the file after the job transfer, can be placed.
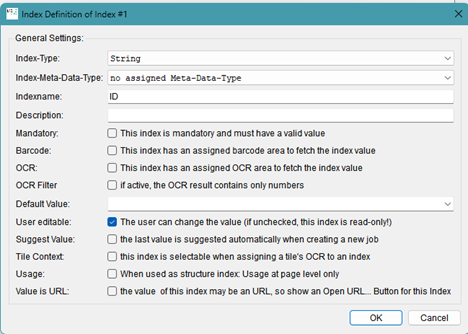
e.g. Index Sting
- Close the dialog with ok.
- Select the tab transfer targets
- Select the defined transfer target from the list and open the dialog via the button edit or a double click.
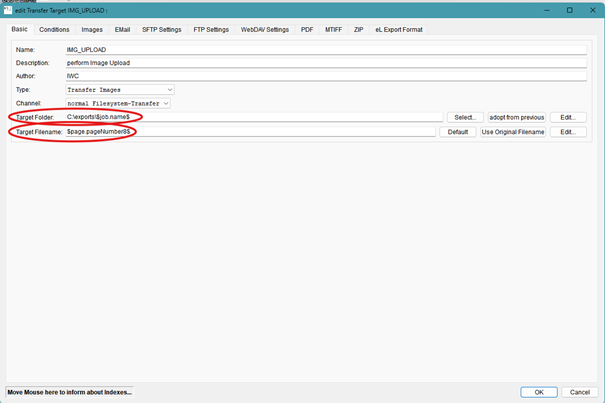
- Target folder: this is where you define the path and the name of the folder that is created when you transfer a job. $job.nam$ references to the BCS-2 Job name, to use the index place $job.index1$
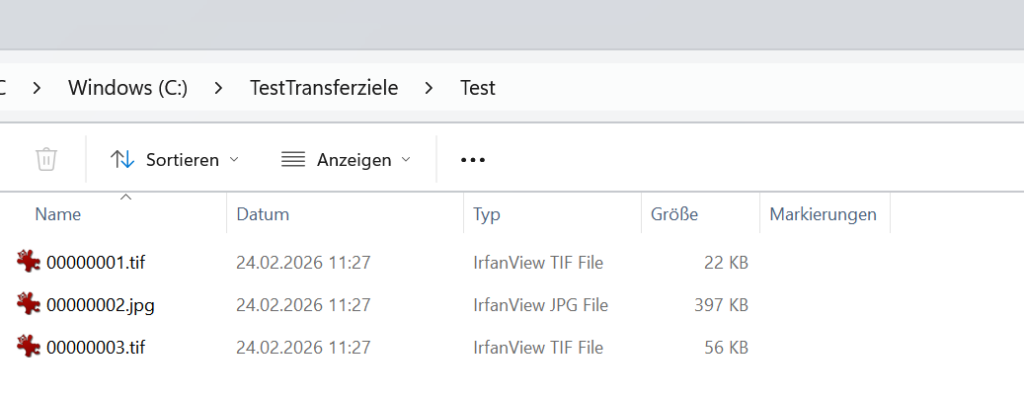
- Target filename: this is where you define the name of the images $page.pagenumber8$ gives out the image number with 8 digits e.g. 00000001.tif you can decide if you need a different number of digits or if the index name is also to be used.
- Save the settings via ok, and end first the workflow dialog and then the Configurator dialog with ok
If you now start a new job in BCS-2 , you will first have to enter a job index. The indexname is also displayed in the job list. When you transfer the job after you are finished, BCS-2 will use the variables defined in the workflow to name the file and the images.
- Create Job
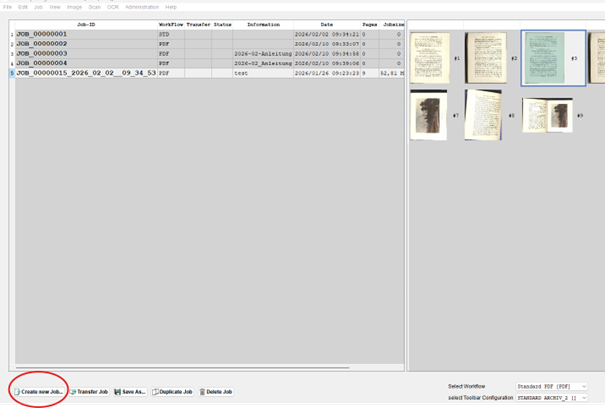
- Enter Index
- Scan and process scans
- Leave Job and transfer job
- Control result