

1. Program Startadd chapter
Open BCS-2 using the icon on your desktop.
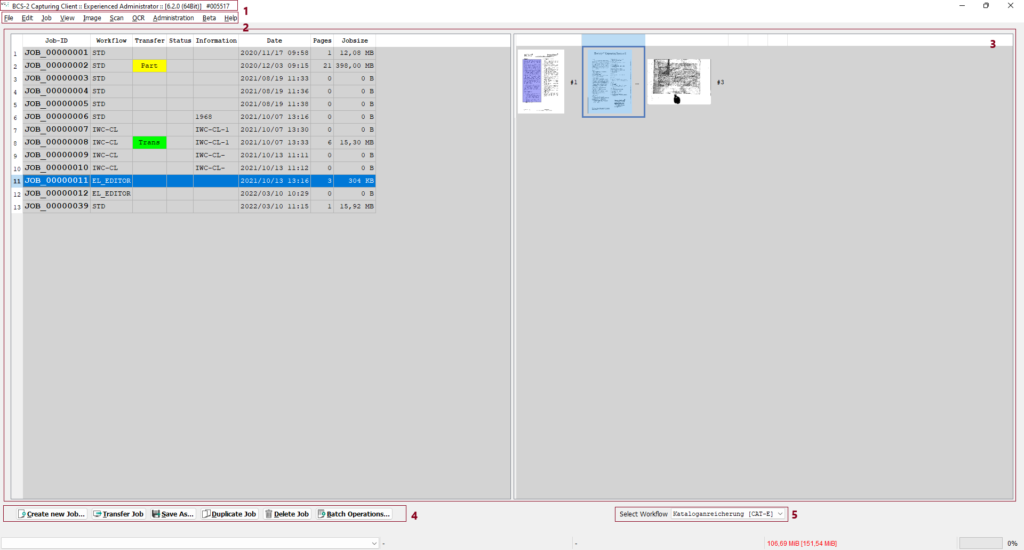
In the header (1), BCS-2 displays the name of the application as well as the version and license number.
Below the menu bar (2) the job overview list (3) is placed, which is divided into two areas. On the left you see the job list. The last job created is located at the bottom of the list, provided the list is sorted by job number. The job last opened within a BCS-2 session is highlighted in light grey. On the right side the thumbnails of the images of the job currently selected in the job list are placed.
The buttons (4) below the job list allow you to create, transfer, save, duplicate and delete jobs. In the professional version you also get the option to run batch operations on a job. Use the dropdown lists on the right (5) to select saved toolbars and workflows.
1.1 Job Listadd section
Following default columns are defined and display about the jobs after the installation :
- Job No.: BCS-2 internal job number
- Workflow: Workflow type of the job
- Transfer: Status of the transfer
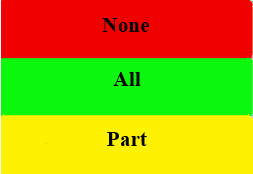
Red (None): The transfer failed. Check your configuration and submit the job again! Green (All): Error-free transmission of the job. Yellow (Partial): BCS-2 was unable to execute all active transfer targets. The application only displays this status if several formats are generated during a transfer and different transfer targets have been created for them. Check the faulty transmission(s)!
- Status: Display of the actions performed on the job, e.g. “Trans” if the job was transferred.
- Information: Display of the index content (definition in the workflow).
- Date: Time the order was created.
- Number of Pages: Number of images included in the job.
- Job Size: Size of the job in kilobytes or megabytes.
You can sort the job list by clicking on one of the column headings.

The information shown in the job-list columns can be defined in the tab "Job List" in the General Settings (Office Configurator)
1.2 Job Vieweradd section
The viewer on the right shows the thumbnails of the job selected in the job list. In addition to the overview of the existing images, this view is also used to display image information and to navigate to a selected image. For jobs with many images, it may take some time until all images are loaded, so it is possible to deactivate the thumbnails via the menu item “Toggle Thumbnail View (Job-List)”.
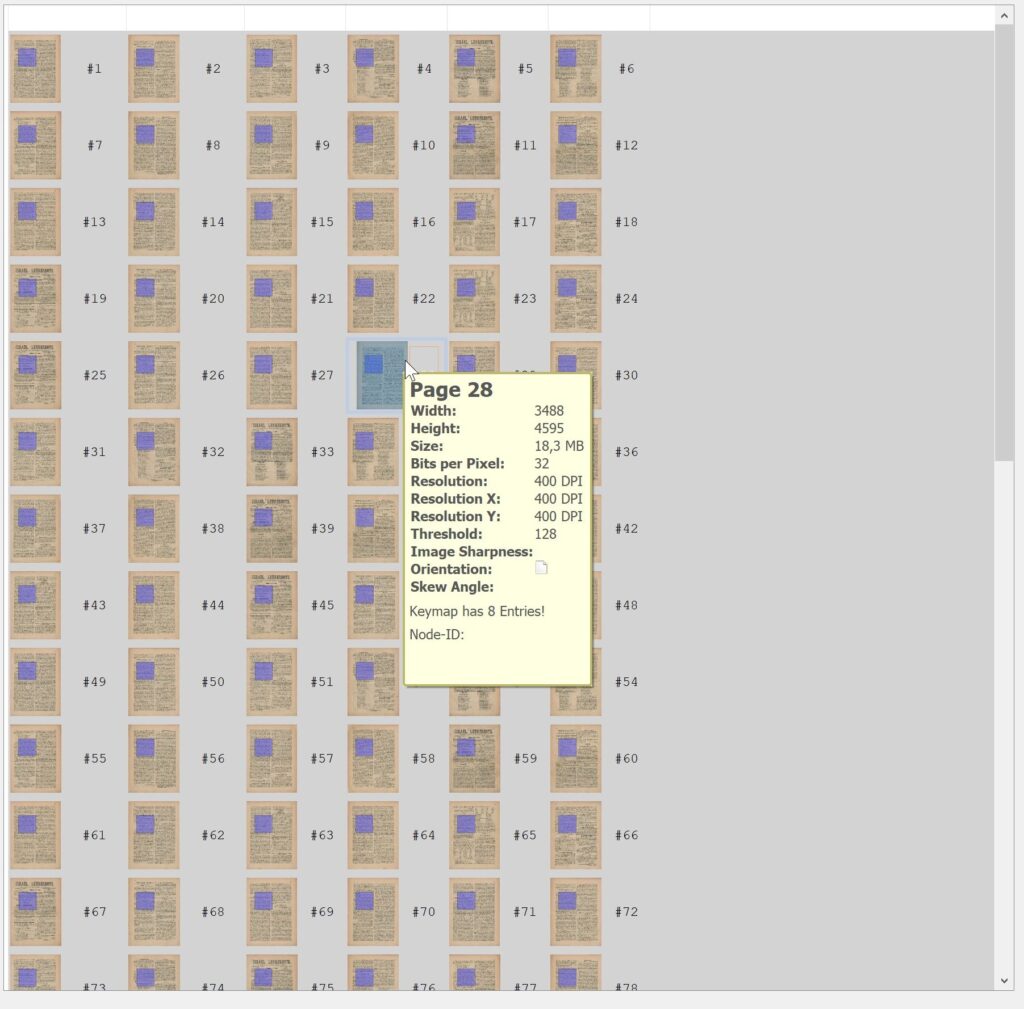
Open job: You open the job by double-clicking on one of the preview images and BCS-2 displays the image previously selected via the preview.
Display image information: Mark one of the images in the viewer by clicking on it. If you stay within the marker with the mouse pointer, BCS-2 displays the following image information:
- Width: Width of the image in pixels
- Height: Height of the image in pixels
- Size: Size of the image in kilobytes or megabytes
- Bits per pixel: Color depth in pixels
- Resolution: Total resolution of the image in dpi (“dots per inch”)
- Resolution X: Width resolution in dpi
- Resolution Y: Height resolution in dpi
- Threshold: Threshold stored for the binarization
- Number of keymap entries: Number of additional information available for the image
1.3 Workflow and Toolbar Selectionadd section
Below the viewer, BCS-2 displays a drop-down list with all available workflows. The visible workflow is always the active workflow.
Below there is a drop-down list of custom toolbars. Selecting a new toolbar requires a restart of BCS-2 so that layout changes are reflected correctly.
Administration and management of jobs
The administration and configuration of the jobs you create is done either via the buttons located below the job list or via the job menu.
Buttons
Create new job: Opens the BCS-2 application for scanning and post-processing of images.
Submit Job: Submits the job according to the presets in the workflow.
Save As: Saves the images of a job.
Duplicate Job: Duplicates the selected jobs.
Delete Job: Deletes the selected job.
Batch Operations: Brings up the “Apply Operation to Job” form for batch post-processing.
Job Menu
The options and functions available in the “Job Menu” are used for processing jobs via job management and for processing jobs within job mode. The options that are not available are greyed out.
Import job from a job file: Opens a saved job file. BCS-2 loads the images and metadata stored in the job for further processing.
Create new job from eL export container: Imports a “MyBib eL” job that is available as a ZIP container. The images and optionally the existing OCR files as well as the structure and index data are taken from the Metadata. XML file and missing indices are created.
Create new job: Creates a new, empty job for the active workflow.
New Job: Creates a new job. Opens the BCS-2 application for scanning and post-processing of images. Create new jobs by import… (BCS-2 Professional only): Configures the batch import.
Submit Job: Submits the job according to the presets in the workflow.
Delete job: Deletes the marked job.
1.4 Job Menuadd section
Some functions in the “Job” menu can only be used via the start interface. All others are available via the job interface. Functions that are currently not usable are grayed out. Some of the functions are only displayed if the corresponding module is licenced (e.g. MyBib eDoc, Barcode Suite)
Create new job from Folder: Invokes the Windows file load dialog to open a previously saved BCS-2 job file. BCS-2 loads the job images and metadata contained in the file for further processing.
Create new Job from eL Export-Container (only Professional or with the module “MyBib Connector“): Opens the form for importing a “MyBib eL” job in ZIP format.
Create new Job: BCS-2 creates a new, empty job for the active workflow in the job list.
*New Job: BCS-2 creates a new job and opens the job editing window.
create Jobs by Import… : Opens the “Create job by import” window for configuring the batch import.
create Jobs by MyBib eDoc orders… : Opens the “Create job by MyBib eDoc orders” dialog for configuring the batch import (requirement: MyBib Connector and workflow).
Transfer Job: BCS-2 transfers the job according to the default settings in the workflow.
Upload Job into file: BCS-2 saves the selected job or jobs in BCS-2 job files. By default, the file name consists of the name of the job plus date and time the file was unloaded.
Delete Job: BCS-2 delete marked job.
1.5 Batch processing jobsadd section
You can also carry out the job actions “duplicate”, “transfer” and “delete” for several jobs at the same time. To select several jobs from the list, hold down the “CTRL” key and left-click on the desired jobs with the mouse. Jobs listed one below the other can be selected using the combination of shift key and left mouse click on the first and last job. By clicking in the upper left corner of the table you select all jobs in the list. In this way, BCS-2 processes long order lists in one go.
1.6 Create new jobs through import… add section
(BCS-2 Professional only, can also be purchased as a module for Office)
The prerequisite for the use is the “BCS-2 Importer Module”, which is included in BCS-2 Professional. By importing file folders containing images, you automatically create new jobs for the active workflow. The newly created jobs are available via the job list after the import. The import is noted in the status field of the job list with the entry “imp”.
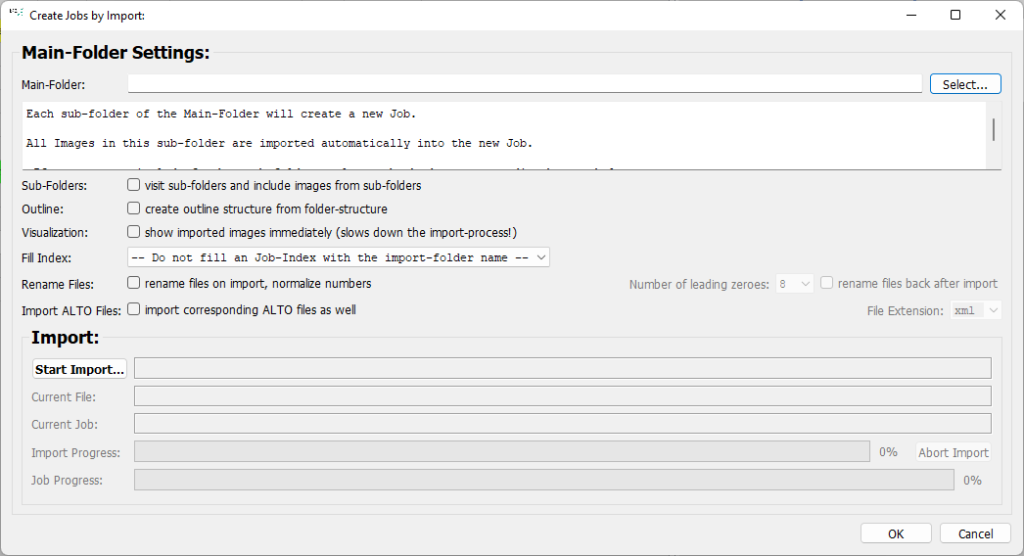
 1. The job is created for the currently active workflow!
2. Always make sure that the name of the file to be imported does not contain simple numbering such as 1,2,3 etc. The leading zeros, 0001,0002,0003, etc. must be present.
Main import directory: Enter the path to the main directory here. Alternatively: Call up the navigation menu via “Select” and select the main directory there. Each subdirectory in the main directory leads to a new job. BCS-2 integrates the images in the respective subdirectories in alphabetical order in the new job.
Subdirectories: Include subdirectories and import images: BCS-2 also takes deeper directories into account when integrating them into the job.
Outline: Create an outline structure from the directory hierarchy: BCS-2 creates an outline structure based on the directory hierarchy.
Visualization: Show imported images directly (slows down the import): BCS-2 shows the import of the individual image files into the jobs. This option slows down the import, but offers the possibility for an initial, brief quality assurance.
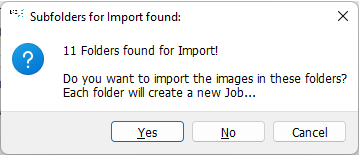
Index to fill: Selection of the workflow index in which the file name is adopted as job index. Start import: Activates the import. Before starting, BCS-2 checks the number of existing folders and displays this information in a pop-up window:
BCS-2 only starts the import after the information window has been confirmed. Abort: Stops the import. If the “Visualization” option is activated, BCS-2 removes the current job. All jobs imported up to this point are retained. If the “Visualization” option is not activated, the current job runs through to the end and is saved alongside the already imported jobs.