

17. ImportSuiteadd chapter
Using the ImportSuite, you can automatically create new jobs for the currently active workflow by importing file folders that contain images. After the import, the new jobs are available via the job list. The import is noted in the status field by the abbreviation “imp”.
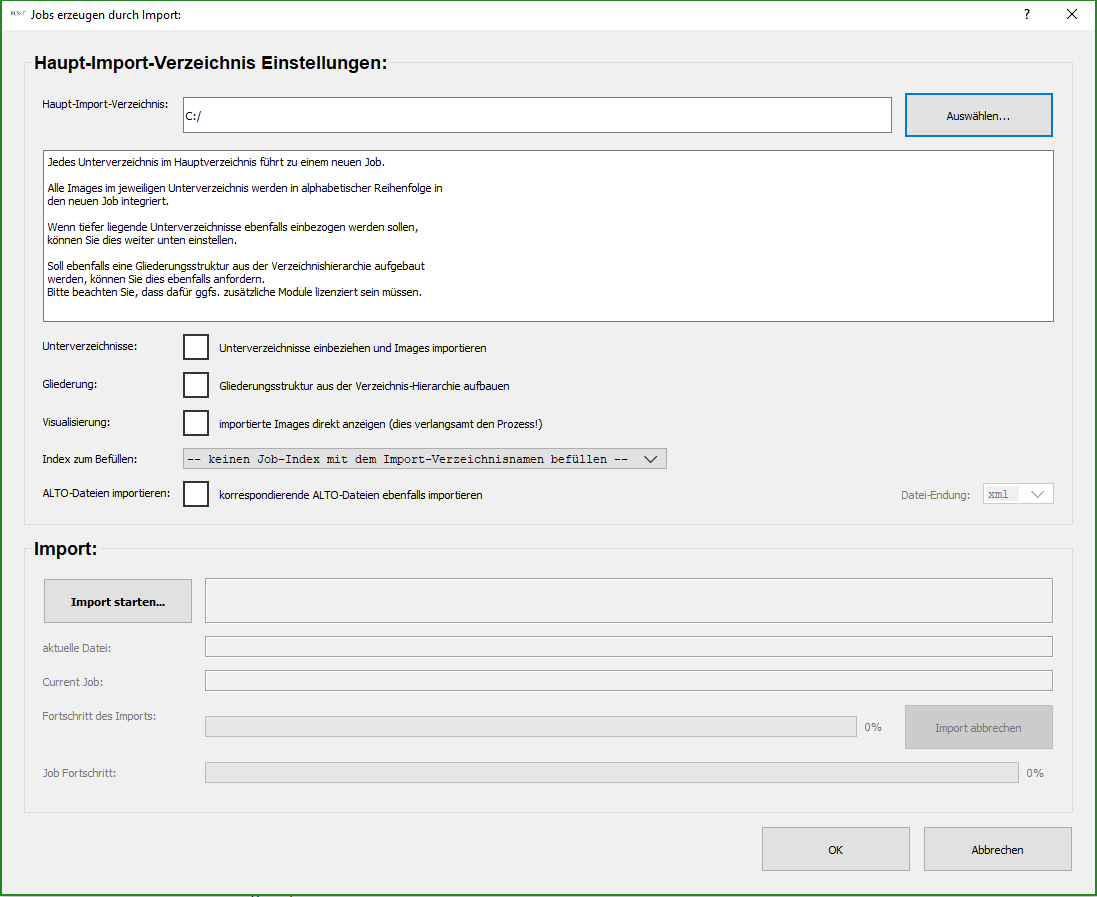
You open the form for configuring the “Importer” via the menu item “Create Jobs by Import…” in the “Job” menu.
The menu item is only available via the BCS 2 start interface. Within the job module, the option is greyed out. Note the following points before you start an import:
1. BCS-2 always creates jobs for the currently active workflow! 2. Always make sure that the names of the files to be imported do not contain a simple numbering (1,2,3...). The leading zeros (e.g. 0001,0002,0003) must always be present.
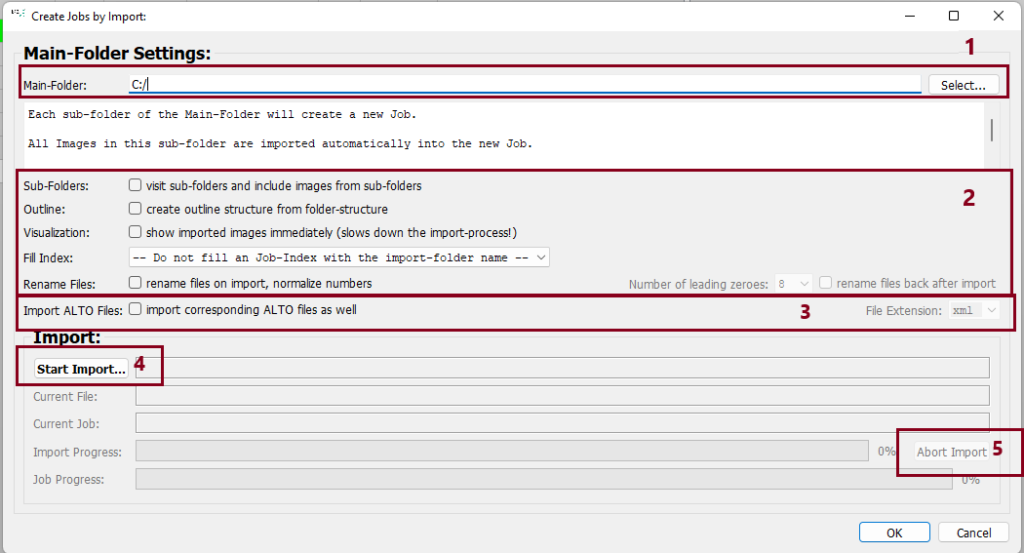
Main Folder (1): Enter the path to the main directory here. Each subdirectory in the main directory leads to a new job. BCS-2 integrates the images in the respective subdirectory into the new job in alphabetical order.
Sub-Folders: visit sub-folders and include images from sub-folders (2): Activate this option if you want BCS-2 to also take deeper subdirectories into account during the import.
Outline: create outline structure from folder-structure (2): By activating this option, BCS-2 creates a structure based on the directory hierarchy. This feature will be made available in a future update.
Visualization: show imported images immediately (slows down the import process) (2): BCS-2 shows the import of the individual image files into the jobs. This procedure slows down the import, but offers the possibility for an initial, brief quality assurance.
Fill index(2): Use the drop-down list to select the workflow index in which BCS-2 adopts the file name as the job index.
Rename Files: rename files on import, normalize numbers (2): Rename files without leading zeros. If the zeros are missing, BCS-2 does not sort the imported images in the desired order in the target folder. The number of leading zeros can be set, the default value is 8. Optional:If needed, request reverting to the old file name after import if renaming is permanently not allowed and/or makes sense.
Import ALTO Files: import corresponding ALTO files as well(3): You use this function to import the ALTO files associated with the image. You either enter the file extension of the ALTO files directly or use the existing selection option: xml, alto, dat. During import, BCS-2 checks whether there are corresponding ALTO files for an image (same file name, extension, see above) . If so, BCS-2 converts this into an OcrDoc object and saves it on the new page. In parallel, BCS-2 automatically generates:
- the OCR text IWC XML format (eL)
- the OCR full text
- the repeal of the ALTO XML format
Start or cancel import
Start Import (4): Starts importing the image files. BCS-2 checks the number of existing folders beforehand and displays this information in a separate window.
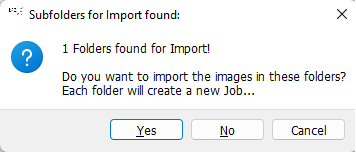
By clicking on the “Yes” button, BCS-2 starts the import. BCS-2 displays the status of the import via the corresponding progress bar and the information fields displayed above it. Abort import (5): You can stop the import at any time by clicking on the “Cancel import” button. If the “Visualization” option is activated, BCS-2 deletes the current job. All jobs imported up to this point are retained.
When importing Tiff files, jobs with large data volumes may be generated. The reason for this are the Tiff images. All Tiff images have the same geometry and therefore the same size after saving as uncompressed Tiffs.