

16. Assign OCR Areas to Indexesadd chapter
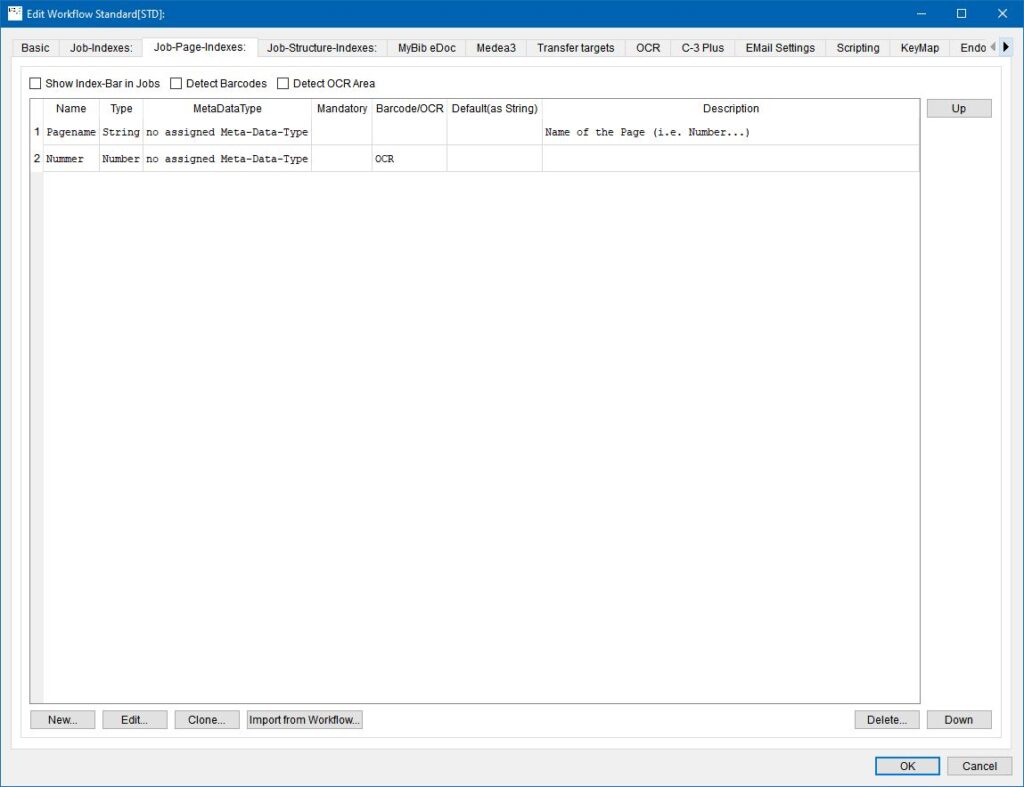
To fill Job-Indexes or Job-Page-Indexes with OCR results, you first have to define OCR Indexes in the tab “Job-Indexes” or “Job-Structure-Indexes” of the workflow in the BCS-2 Office Configurator or Professional Administrator.
Create and edit OCR-Index: Use the “New…” or “Edit…” buttons at the bottom of the index list to call up the “Index definition” form, in which you define and edit the job index.
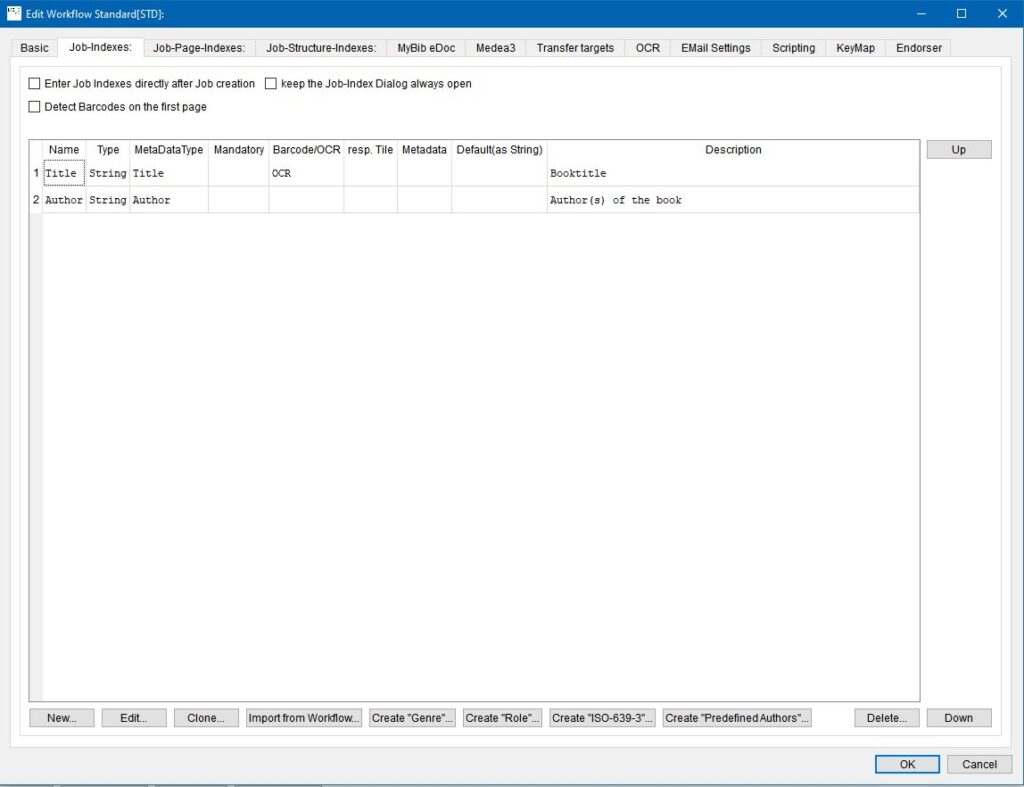
For an OCR-Index select following Settings:
Index-Type: The index type determines the type of index field. An OCR index is of type “String” or “Number”.
OCR: This index has an assigned OCR area to fetch the index value An OCR area can be defined for this index, the result of the OCR is automatically written into the index
OCR Filter: if active, the OCR result contains only numbers (can only be used for Index-Type ‘Number’): If this function is active for the ‘Number’ index type, all characters that are not numbers are deleted from the OCR.
16.1 Assign OCR Areaadd section
The OCR areas are selected and asigned within BCS-2. First you create a new job with the corresponding workflow. You also need a scan of a representative sheet with areas that are to be read out.
Use the “Assign OCR areas” menu item in the “Job” menu to open the form for recognizing and assigning the OCR areas.
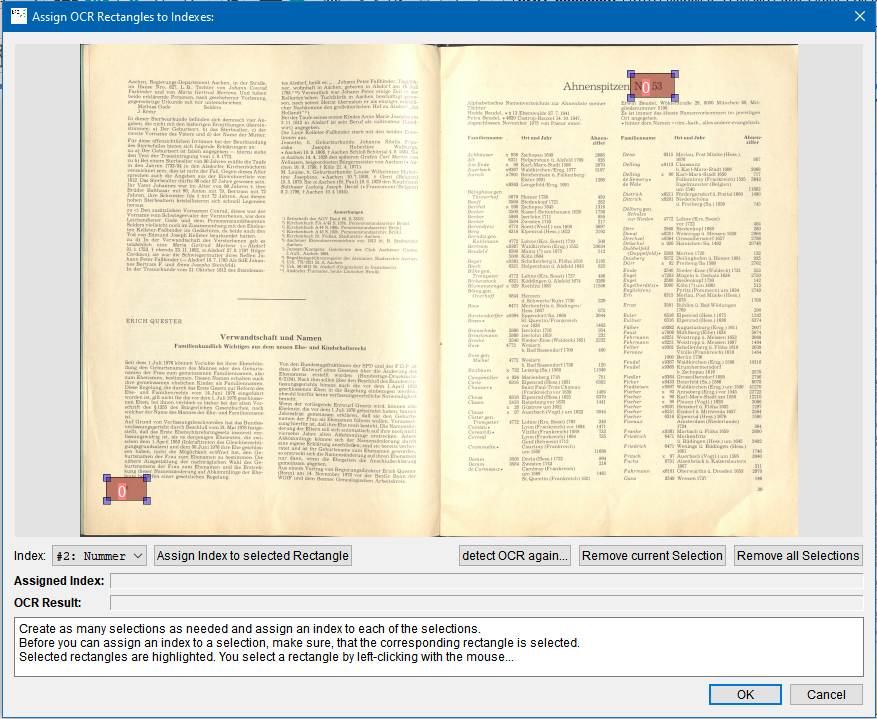
In the viewer of the form, BCS-2 displays the current scan. Create an OCR area by selecting (right-clicking and dragging) the desired barcode.
Assign OCR: By selecting an area, you enable OCR and assign an index to the OCR area.
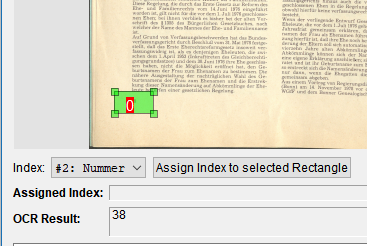
Use the drop-down list below the viewer to select the desired index for this OCR area and assign it using the “Assign index to the selected rectangle” button. BCS-2 then displays the assigned index in the area.
In order to accept the data and to activate the automatic assignment, BCS-2 must be restarted.