

5. Toolbars Professional – Toolbar Configuration Officeadd chapter
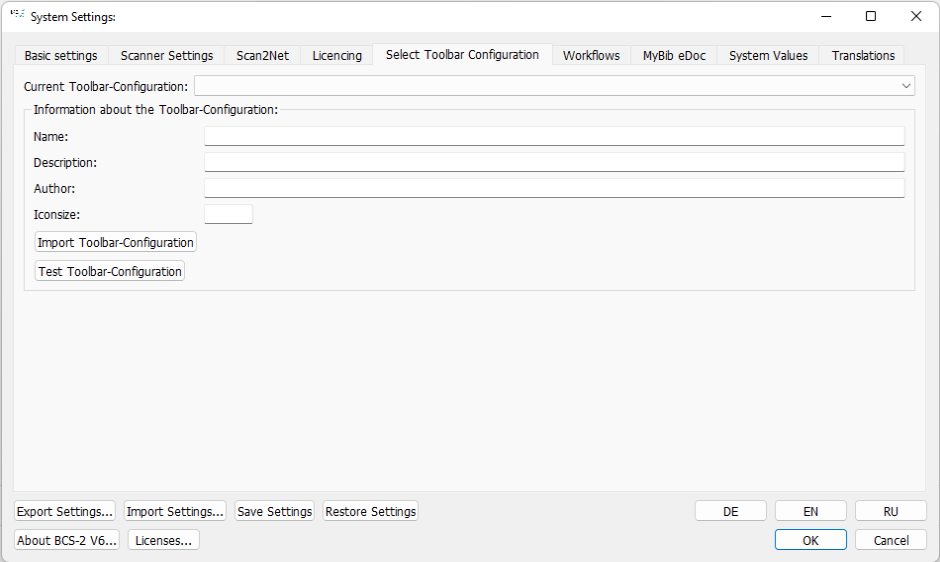
5.1 Toolbar Configuration – BCS-2 Officeadd section
ImageWare delivers BCS-2 Office with a standard toolbar layout. There are adapted layouts for special workflows and scanner connections, which are included in the scope of delivery of the respective BCS-2 Office version. Basically, you can order a toolbar configuration for each BCS-2 Office version, that is specially adapted for you. You can load the additional toolbar configurations using the “Import toolbar configuration” button. They are then available for selection via the drop-down list under “Current toolbar configuration”. Use the “Test toolbar configuration” button to check the selected toolbar configuration. You can select saved toolbar configurations from the drop-down list in the “Toolbar configurations” segment.

5.2 Toolbars – BCS-2 Professionaladd section
Use the “Toolbars” tab to create, export or import toolbar configurations and toolbars for BCS-2 Professional.
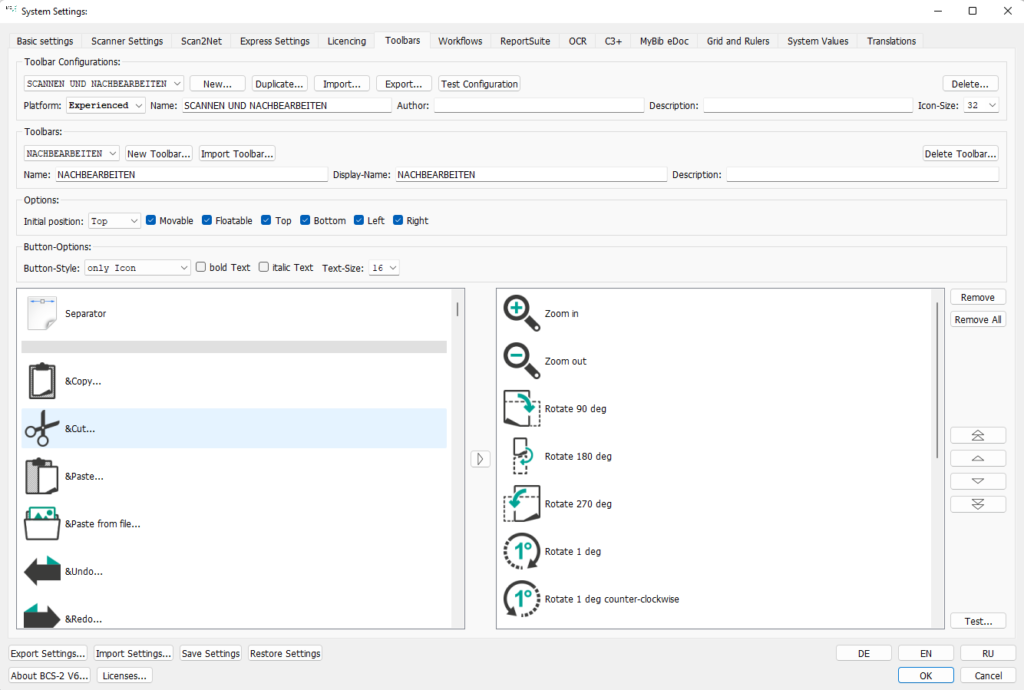
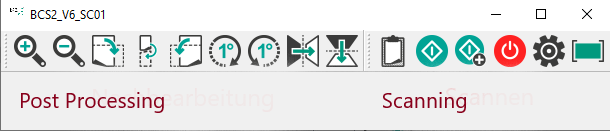
A “toolbar configuration” consists of one or more toolbars. The name of the toolbar configuration reflects its inherent functions, e.g. B. “Scanning and post-processing”. The “Scan” toolbar contains the functions required for scanning and the “Post-processing” toolbar contains the functions required for post-processing. Together both toolbars form the “Toolbar configuration” “Scanning and post-processing”. First you create and configure the toolbar configuration and only then the associated toolbars.
Always adjust the “toolbar configurations” to the workflow and/or your users so that BCS-2 only provides the functions that are required. Make the operating process clear to your users by arranging the icons.
Create a New Toolbar Configuration

Dropdown list: Select an existing toolbar configuration for editing.
New: Create a new toolbar configuration. The name of a configuration must always be unique so that it can be found again. In the case of special adjustments, also store a description of the configuration.
Plattform (Express, Office, Professional): Determines the BCS-2 version for which the toolbar configuration is intended. During creation, BCS-2 checks whether the selected functions are included in the BCS version used.
Test Configuration: Opens the selected toolbar configuration to check the included toolbars, the position, the number and the size of the displayed icons.
Icon-Size: Determines the size of the icons in pixels.
Toolbars
In the “Toolbars” area you create, edit or delete toolbars for the current toolbar configuration.

Dropdown list: Selects an existing toolbar to edit or delete. After selecting or creating a toolbar element, BCS-2 displays the name, the configuration and the function icons assigned to the toolbar in the list on the right.
New Toolbar: Creates a new toolbar. The naming should be unique to simplify the transfer to other toolbar configurations.
Since BCS-2 sorts the list of toolbars and thus the arrangement of the elements in the configuration alphabetically, number your toolbars so that BCS-2 displays them in the correct order.
Import Toolbar importieren: Opens the window for selecting a toolbar from an existing toolbar configuration.
Options

Initial position (Top, Bottom, Left, Right): Determines the starting position of the selected toolbar.
Moveable: Allows users to move the toolbar.
Floatable: The toolbar can be placed anywhere, even in the viewer.
Button Options
Determine here how BCS-2 displays buttons:

- only Icon
- only Text
- Text beside Icon
- Text under Icon
Font size and type (bold/italic) can also be set. In the lists at the end of the form, BCS-2 displays all available function icons on the left and the icons assigned to the selected toolbar on the right.
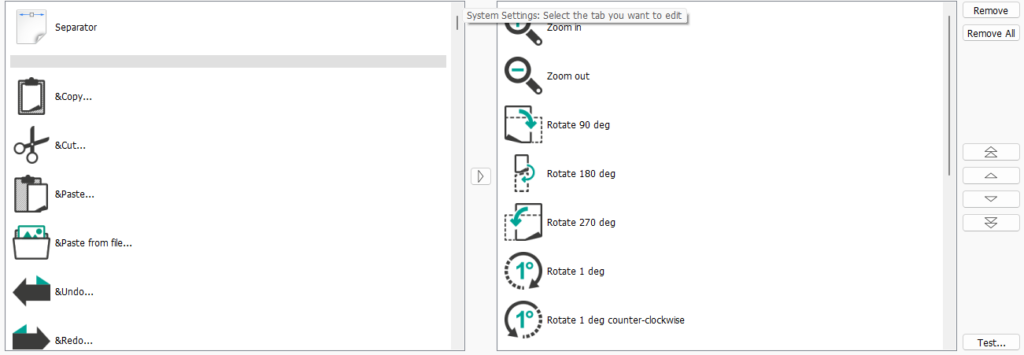
To add an icon to the toolbar, select the desired icon in the list and assign it to the toolbar either using the arrow in the middle or by double-clicking on the icon. You can change the order of the icons using the arrow keys to the right of the toolbar window. To remove an icon from the toolbar, select it in the list on the right and delete it using the “Remove” button. To visually separate functions or functional units within a toolbar, insert separators in the toolbar. You can check the layout and the selected button options using the “Test…” button.