

4. Transfer Targetsadd chapter
Clicking on the “Transfer targets” tab opens the list of transfer targets with the buttons required for creating, editing, deleting, cloning and sorting the entries. Here you determine the output format and the goal of the workflow.
Name: Name of the transfer target.
Active: Active transfer targets marked by “*”.
Type: Type of transmission.
Global Condition: Condition for the job transfer.
Page Condition: Condition for transferring pages.
Description: Short description of the transfer target.
4.1 Basicadd section
Use the “Basic” form to configure the basic settings for the transfer target.
Transfer-Target active: By marking the checkbox you activate the transfer target for the transfer of the job.
Name: Name of the transfer target.
Description: Short description of the transfer target.
Author: Author of the transfer target.
Type: Determines the form in which the data is transferred during the transfer:
- Transfer Images: BCS-2 saves the images of the job in the file folder specified under “Target directory”. You specify the image format via the “Images” tab. Enter the variable for forming the file name in the “Target file name” field.
- Create PDF: When transferring the job, BCS-2 creates a PDF file of the images. Store variables for page naming in the “PDF” tab.
- Create MTIFF: When transferring, BCS-2 creates an MTIFF file.
- Create ZIP: BCS-2 creates a ZIP file.
- Upload to MyBib eDoc System: Requirement MyBib eDoc- Connector and Workflow. BCS-2 transfers the files to MyBib eDoc.
- Upload to Medea 3 System: BCS-2 sends the files to a defined Medea 3 system.
- eL Export-Format erzeugen (Voraussetzung eL-Workflow): BCS-2 creates a ZIP container with all eL data (Images, Metadata.XML, IWC-OCR-XML)
- Execute Program: Scripts are suitable for creating a variety of file formats, especially for the output of meta and OCR data (METS/MODS, OCR formats, XML, TXT, CSV, etc.).
Channel: The following transfer types are available via the drop-down list:
- normal Filesystem-Transfer: BCS-2 saves the images in the desired format in the file system. Enter the target directory in the field below the drop-down list.
- Transfer via FTP: Upload the files to a server via FTP. The FTP configuration is done in the “FTP” tab.
- Transfer via SFTP: Upload the files to a server via SFTP. The SFTP configuration is done in the “SFTP” tab.
- Send EMail: BCS-2 sends the images as an email attachment. The e-mail configuration takes place in the “E-mail” tab.
Target Folder: For the transfer type “normal transfer in the file system”, enter the target directory here.
Target Filename: Enter the variable for the file name(s) here. A click on the “Default” button accepts the default variable stored in BCS-2.
4.2 Conditionsadd section
Via the “Conditions” tab you open the form for creating job or page index-dependent conditions. These conditions must be met during the transfer so that BCS-2 transfers a job or pages of a job. In the upper part of the form you specify conditions for the entire transfer target, in the lower part for individual pages of a job. By ticking the checkboxes “This transfer target is used only if the condition below is true” and “each page is used by the target only if the condition below is met” you activate the input fields. Use the “Wizard” button to call up the BCS-2 assistant, which will support you in creating your condition(s).
Global Conditions for the transfer target:
Select the “Job Index” in the left drop-down list, which will be compared with the value to be entered in the right field.
From the 2nd drop-down list, select one of the following conditions:
- is equal to
- is not equal to
- starts with
- ends with
- is greater as
- is less than
- is greater or equal to
- is less or equal to
Condition for each page (only Professional, Modul Index Suite): Checks whether the page index meets the condition.
4.3 Imagesadd section
In the Images form, you configure the image formats for the different types of transfers.
automatically append correct extension: BCS-2 automatically appends the file extension corresponding to the selected file format to the file name.
This option must be enabled, otherwise Windows will not display the images correctly.
create path for every image: BCS-2 automatically creates the path for every image.
create MD5 Hash for every image: The MD5 hash file for all images of a job is created and stored via a second transfer target.
Masking and Splitting
apply splitting, if splitline is set: BCS–2 splits the images before transfer if a split line is set.
apply masking using only the first tile: BCS–2 crops the images when there is a mask or area on an image.
apply multi-masking: The images are cut before transfer if there are one or more areas on them.
when masking: keep the original image: When cropping, BCS-2 does not replace the original images with the edited ones, but transfers them. The original is always in the order before the edited image.
JPEG Imageformat
create JPEG Images: BCS-2 speichert die Images als JPEG-Dateien.
JPEG Quality: Determines the quality of the images. The higher the quality, the more detailed, but also larger is the image file.
leave bitonale Images as TIFF (CCITT compressed): BCS-2 stores all bitonal images as TIFF images. If this checkbox remains disabled, BCS-2 automatically converts binary images to 8-bit images.
JPEG 2000 image format
Create JPEG 2000 images: BCS-2 saves the images in JPEG 2000 format.
JPEG 2000 Quality: Sets the compression of the images. BCS-2 includes two different software toolkits for processing images in JPEG2000 format: JasPer and OpenJPEG. By default, BCS-2 uses JasPer. If you activate the checkbox “Use the OpenJPEG library to create JPEG2000 images“, OpenJPEG is active. The libraries differ in the use of the compression rates to be entered:
JasPer: lossless = 100, i.e. the smaller the value, the higher the compression
OpenJPEG: lossless = 1, i.e. the higher the value, the higher the compression
Keep Alpha Channel: BCS-2 retains the information contained in the images for transparency. BCS-2 therefore saves 32-bit images.
No Image Processing, Use TIFF Images Directly: Speeds up the processing of the order enormously by dispensing with image processing.
Select the option ‘No image processing, use TIFF image directly’ and BCS-2 will automatically save colour images as 32-bit images.
TIFF Imageformat
create TIFF Images: BCS-2 saves the images as TIFF files.
keep Alpha-Channel when storing as TIFF (this generates 32-Bit TIFF Images): BCS-2 generates 24-bit TIFF files instead of 32-bit when saved.
use LZW Compression: BCS-2 uses the lossless compression method LZW to compress the TIFF files.
TIFF or EXIF tags
If the TIFF or EXIF tags checkbox is activated, BCS-2 saves the metadata selected in the list in the TIFF file. To define the tag content, open the form for editing the tag by double-clicking on the list entry.
In the upper part of the form enter the variable for the tag. Configure the transfer targets within a job, test your configuration by clicking on the “Execute” button. When executing the job and thus the transfer target, BCS-2 saves all selected metadata in the TIFF file.
Empty tag values result in the tag not being written. Special case DateTime: The set value is irrelevant here, since BCS-2 automatically saves a time stamp when the tag is activated.
List of Metadata Tags (TIFF/EXIF)
TIFF:
- (269) TIFFTAG_DOCUMENTNAME: name of document image
- (270) TIFFTAG_IMAGEDESCRIPTION: info about image
- (271) TIFFTAG_MAKE: scanner manufacturer name
- (272) TIFFTAG_MODEL: scanner model name/number
- (285) TIFFTAG_PAGENAME: page name image is from
- (305) TIFFTAG_SOFTWARE: name & release
- (306) TIFFTAG_DATETIME: creation date and time “YYYY:MM:DD HH:MM:SS + zero char \0 (vorgegebenes Format!)
- (315) TIFFTAG_ARTIST: creator of image
- (316) TIFFTAG_HOSTCOMPUTER: machine where created
- (700) TIFFTAG_XMLPACKET: XML packet [Adobe XMP Specification, January 2004]
- (33432) TIFFTAG_COPYRIGHT: copyright string
EXIF:
- (37500) Manufacturer notes
- (37510) User comments
No image editing, direct use of the TIFF image: Speeds up the processing of the job enormously.
PNG Image Format
create PNG Images: BCS-2 saves the images as PNG files.
compress PNG Images: Compresses PNG images.
Further operations:
binarize, using the pages threshold: When converting grayscale or color images into bitonal images, BCS-2 uses the threshold values stored for the images (default value 128).
grayscale: BCS-2 converts color and black and white images to 8-bit grayscale images.
invert: BCS-2 saves the image with inverted image colors.
Rotation: BCS-2 rotates the images by the degrees selected from the drop-down list:
- do not rotate
- rotate 90°
- rotate 180°
- rotate 270°
Scaling: The following scaling options are available for the images from the drop-down list:
- do not scale
- scale to 100/200/300/400/500/600 dpi
Adjust image width: Adjust the image width here, e.g. to create thumbnails:
- do not change width
- set width to 50, 100, 150, etc. px
Adjust image height:
- do not change height
- set height to 50, 100, 150 etc. px
4.4 Transfer by E-mailadd section
Subject: Subject line of the email. By using text and scripting variables, you define a predefined “subject” for each e-mail. You can call up the default subject via the “Default” button.
Body: Enter the message body for your emails here. Text and scripting variables can be used. The standard BCS-2 text “Job: $job.name$ and number of pages: $job.numPages$” can be called up via the “Standard” button.
Sender/Recipient: Enter the default recipient or sender here.
Cc/Bcc: Addressees who receive the message in copy or “blind copy”.
Maximum size in MB: Determines the maximum allowed size for an attachment in MB.
4.5 SFTP and FTP settingsadd section
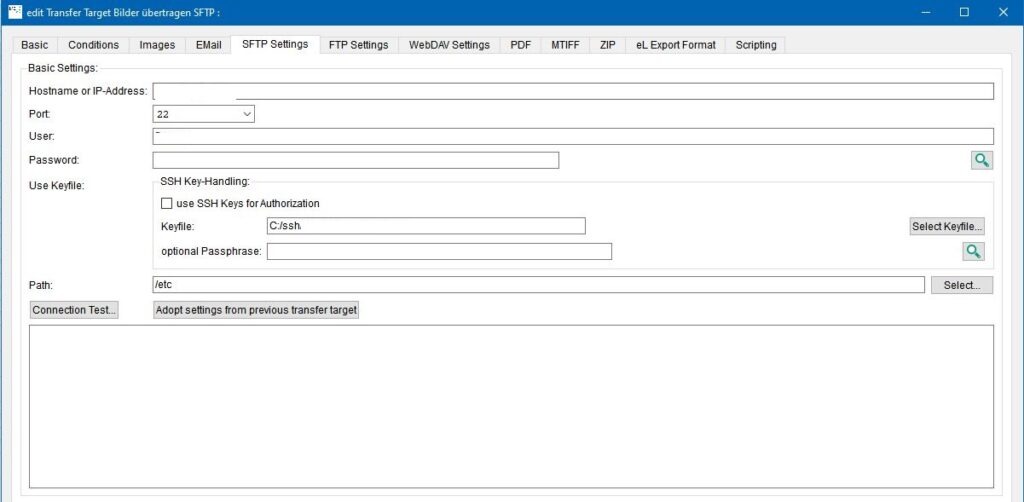
Hostname or IP-Address: Name of the computer or IP address of the server.
Port: Default port 22
Port (only FTP): Allow passive mode for this FTP connection.
Path: Base path for transfer. Enter the target directory in the “Base” form in the “Target directory” field. The full path name is derived from the base path and the destination directory.
Use Keyfile: Activates authorization via key pair.
Keyfile und Select Keyfile: Click on the “Select Keyfile” button to select the required key file. It is displayed in the “Keyfile” field.
Use the “Select” button to call up the form for saving the images on an SFTP server.
In the upper part of the “SFTP Browser” form, first enter the following data for the server:
Host: The computer name or IP address of the machine.
Port: (Default 22).
Switch to FTP Modus: If you activate the checkbox “Activate FTP mode”, BCS-2 uses an FTP connection for the transfer.
Files and Folders
In the lower part of the dialog you can now navigate to the desired storage folder on the server. Folders can be opened by double-clicking.
Below the file display, the following buttons are also available:
 View as Text: View the contents of the selected file.
 Open: Open the selected folder.
 Download: Download the selected file.
Connection test: BCS-2 tests the connection to the server.
Adopt settings from previous transfer target: BCS-2 adopts the settings of the previous transfer target.
4.6 PDFadd section
Use the “PDF” tab to open the form for configuring the PDF file.
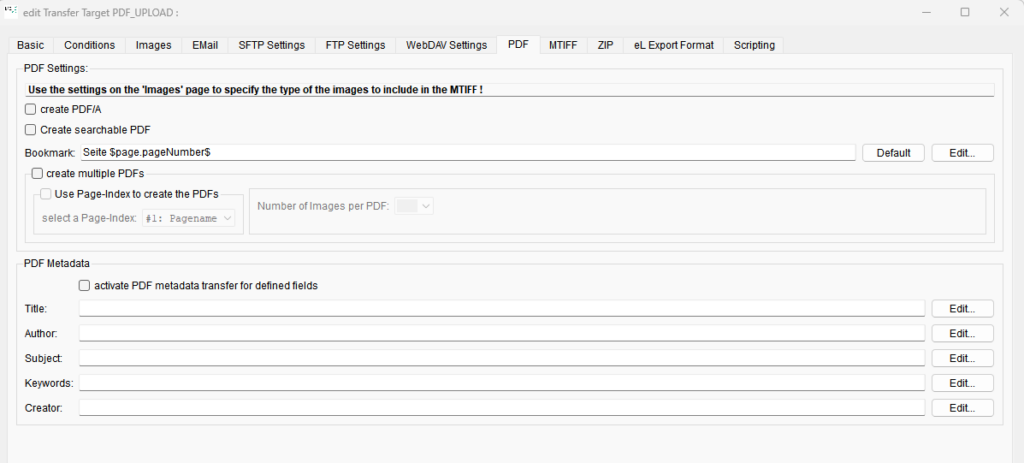
Create PDF/A: A PDF/A-compliant PDF file is generated.
Create searchable PDF (prerequisite OCR Module): A searchable PDF is created 8 the creation of searchable PDF can not be used in combination with the function create multiple PDFs)
Page description: define the name of the pages in the bookmark of the PDF. The default value is “Page $page.pagenumber$”. The constant “Page” and the variable for the page number “$page.pagenumber$” which result in page 1, page 2, etc. as the page name.
Create multiple PDFs
To create multiple PDFs from one job, check the box “Create multiple PDFs”. BCS-2 generates PDF files either by using a page index or by entering how many images the PDF contains. (The PDFs are not searchable; the function create searchable PDF can not be used in combination with this function)
PDF Metadata: Via the PDF tab, BCS-2 provides indexes to searchable PDF files created with Tesseract or ABBYY if required. When you click on “Edit”, a form opens in which you enter the following metadata available for Tesseract:
- Title
- Author
- Subject
- Keywords
- Application
For ABBYY, the following metadata can be used:
- Author (Content.Author)
- Creator (Content.Creator)
- Keywords (Content.Keywords)
- Subject (Content.Subject)
To use indexes for ABBYY, proceed as follows: In BCS-2 open the “OCR” tab and select “Set Global OCR Attributes”.
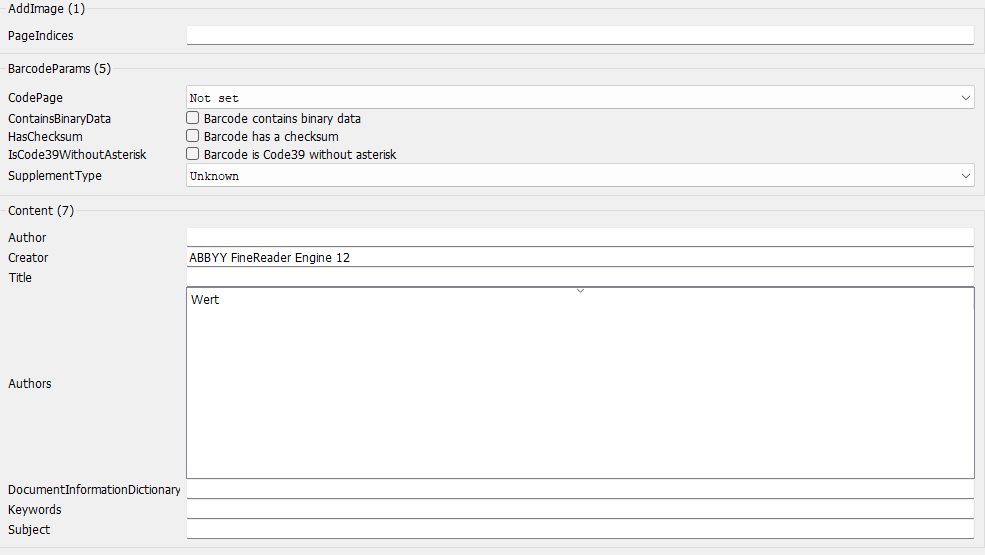
Enter the corresponding expressions in the “Content” section of the corresponding fields. For “Author”, this is “Content.Author”. Fill in the remaining available fields accordingly.
4.7 MTIFFadd section
No settings are necessary here. You can make all the necessary settings using the “Images” and “Basic” forms.
4.8 ZIPadd section
By clicking on the “ZIP” tab, you open the form for configuring the ZIP file.
Configuration at this point is only required if BCS-2 outputs imported images instead of the BCS-2 images.
The import supports the following options:
- Selection of the import directory
- Checkbox “only Images”
- Checkbox „recurse“
- Checkbox „cleanup“
One or more transfer targets create a structure of files and possibly subdirectories, which BCS-2 then packs into a ZIP container and sends to the target location, e.g. via SFTP.
4.9 eL Export Format add section
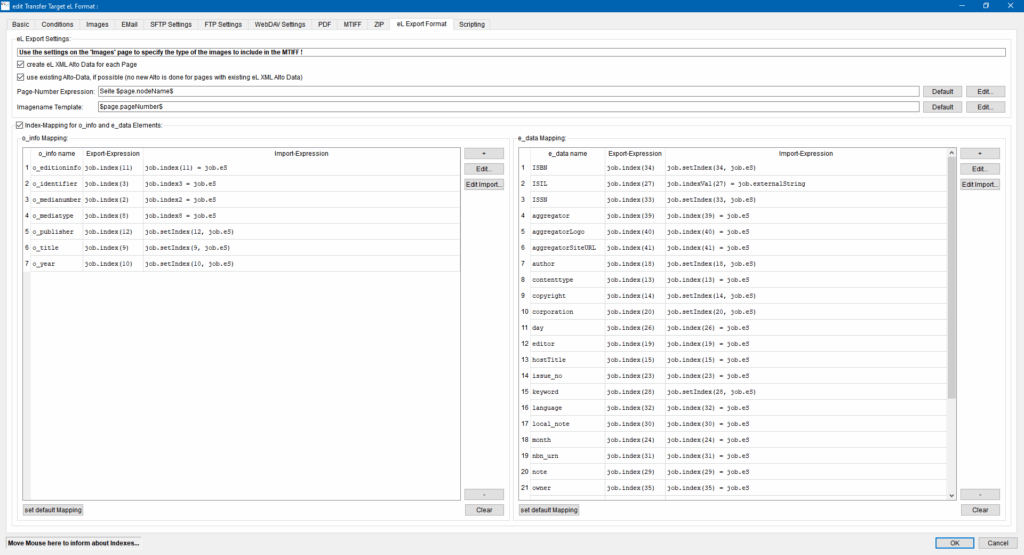
create Alto XML OCR Data for each Page: BCS-2 creates an Alto file for each image. Therefore, you must perform an OCR run before activating the checkbox.
use existing OCR Data, if possible (no new OCR is done for pages with existing eL XML OCR Data): BCS-2 takes the OCR data adopted when importing an eL container and outputs it. The imported OCR data is available until you re-crop the images in the job.
Page-Number Expression: Here you define the page number in the file “Metadata.xml”. Default: Page $page.nodeName$ – BCS-2 takes the page name from the structure tree.
Imagename Template: At this point, you define the image name within the “Metadata.XML” file.
Index-Mapping für o_info- and e_data-Elements
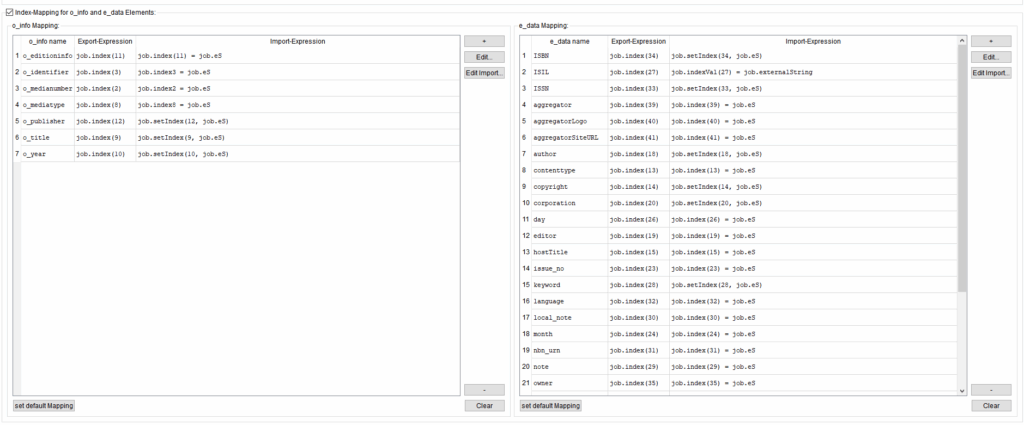
If all e_data values are recorded in a key table in the job indexes, no further configuration is required here. If the e_data data is collected as individual indexes, perform index mapping in the lower part of the form.
Have you recorded an index for each “o_info” and “e_data” value, for example, to allow metadata enrichment via XML query, you must assign the indices to the corresponding “o_info” or “e_data” values. This mapping takes place via the appropriately named lists “o_info-Mapping” and “e_data-Mapping”. The “Export expression” determines the value that BCS-2 enters when creating the “Metadata.XML” file. The “import expression” determines the value that BCS-2 adopts when importing eL containers from the Metadata.xml file into the job index.
BCS-2 automatically performs the index mapping for the o_info and e_data values via the “Set default Mapping” button below the lists. Use the “+” buttons next to the lists to add new values to the list.
The names of the keys must not contain spaces!
Then use the “Edit” or “Edit Import” buttons to define the respective import and export expressions for the key.
BCS-2 stores the o_info and e_data values in alphabetical order in the Metadata.XML file.
4.10 Scripting (only Professional)add section
In the context of workflows and the transfer targets configured in the workflow, “scripting” can be used, among other things:
- To create files in different formats (e.g. PICA, C3+, Marc21-XML)
- The query of metadata of various networks, catalogs and the GND
- To query configuration data
BCS-2 Professional includes a number of JavaScripts, the description of which can be found in our manuals. In-house developments are also possible, but in order to be included in the drop-down list “Selecting a JS template”, they must be saved in the following BCS-2 Professional folder: C:ProgramDataImageWareComponentsBCS2_V6_64js.
Use the drop-down list “Select a JS template” to select a predefined script, which you can transfer to the editor for further editing by clicking on the “Insert JS Template” button. Not all available scripts can be used without changing the code. You must adapt these scripts to different configurations and system environments (for example, queries of your own catalog).