

3. Workflow – Job Page Indexes – Job Structure Indexesadd chapter
Selecting the “Job Page-Indexes” or “Structure Tree Indexes” tab opens the list of configured indices. Here you create new indices, edit existing ones or delete superfluous ones from the list. BCS-2 displays indices in the order in which they were created. Job page indexes apply to individual images, with BCS-2 taking them over for editing the next image. When the job structure index is activated, BCS-2 displays a structure tree with the image numbers below the thumbnails.
3.1 Job-Page-Indexesadd section
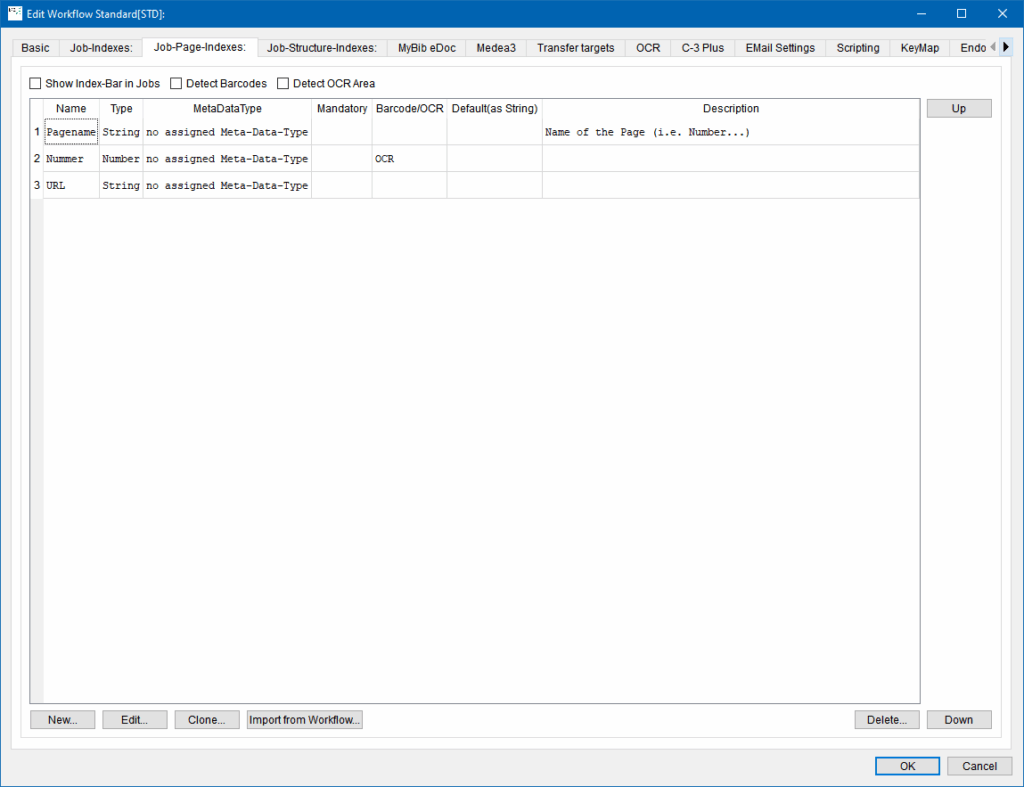
Show Index-Bars in Jobs : Enables the display of the “Job Page Indexes”.
Detect Barcodes: (Prerequisite: BarcodeSuite) BCS-2 identifies barcodes on each page. (Information on where and how Barcode areas are defined can be found in the chapter BarcodeSuite)
Detect OCR Area: OCR is performed in the defined areas, the result will be written in the corresponding index. Assign OCR Areas to Indexes
New…: Calls up the form for creating a new index.
Edit: Opens the form for editing an index.
Clone: Clones an existing index and inserts it as a new index.
Import form Workflow: Inherits indexes from other workflows.
Delete: Deletes the selected index.
Up: Moves the selected index up in the list.
Down: Moves the selected index down.
3.2 Job-Structure-Indexesadd section
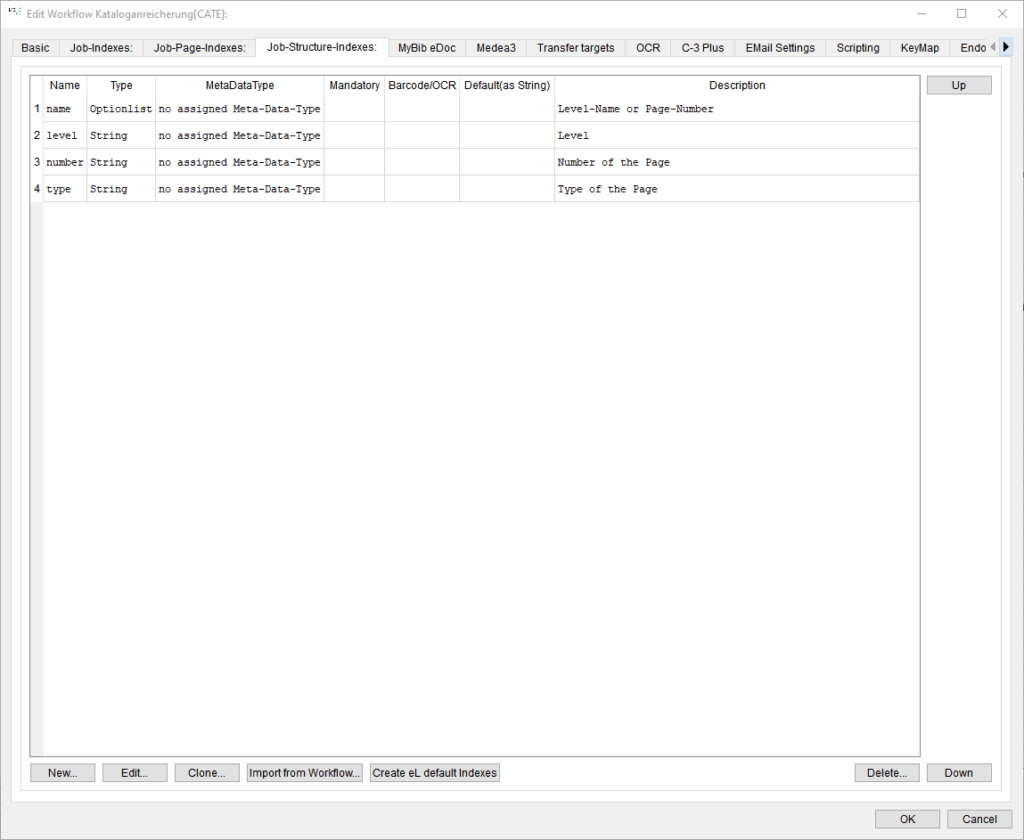
New…: Calls up the form for creating a new index.
Edit: Opens the form for editing an index.
Clone: Clones an existing index and inserts it as a new index.
Import form Workflow: Inherits indexes from other workflows.
Create eL default Indexes: The default indexes to create the xml file for the electronic reading room are created.
Delete: Deletes the selected index.
Up: Moves the selected index up in the list.
Down: Moves the selected index down.
3.3 Create a New Indexadd section
Click on the “New” button below the index list to call up the form for creating a new index:
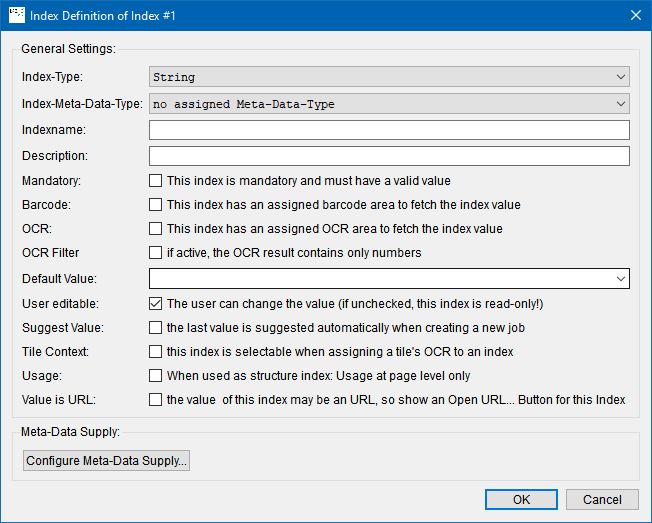
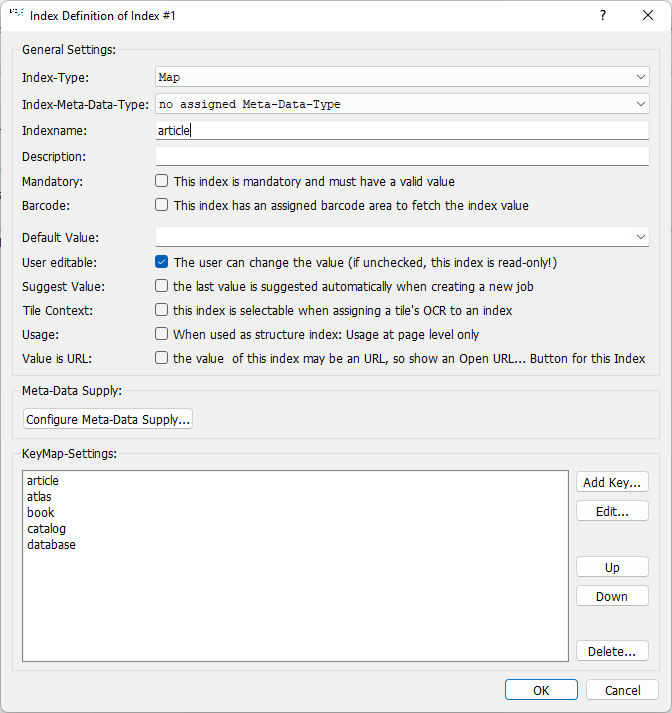
Index-Type: Determines the data type of the index: character string, number, date, etc.
Index-Meta-Data-Type: Assigns a metadata type to the index.
Indexname: Name of the Index.
Description: Optional short description of the index.
Mandatory: This Index is mandatory and must have a valid value: The index field must be filled in by the user before starting the job.
Barcode: This index has an assigned barcode area to fetch the index value A barcode area can be defined for this index, the result of the barcode recognition is automatically written into the index
OCR: This index has an assigned OCR area to fetch the index value An OCR area can be defined for this index, the result of the OCR is automatically written into the index
OCR Filter: if active, the OCR result contains only numbers (can only be used for Index-Type ‘Number’): If this function is active for the ‘Number’ index type, all characters that are not numbers are deleted from the OCR.
Default Value: Assigns a default value to the index, which BCS-2 automatically defines in the index field when the job is created.
User editable: The user can change the value:: The index can be changed by the user.
Suggest Value: the last value is suggested automatically when creating a new job: When a new job is created, it automatically adopts the index value used the last time the workflow was run.
Tile Context this index is selectable when assigning a tile’s OCR to an index: The OCR of an area can be assigned to an index via the context menu of a tile.
Usage: When used as structure index: Usage at page level only:
Meta-Daten Supply: Store a metadata query for your job index or link it to an existing one. Indices configured in this way are automatically filled by BCS-2. Two types of metadata supply are available:
- Enrichment via CSV
- XML queries (e.g. query union catalogue, GND queries)
3.4 Index Typesadd section
String: The index has the data type “string”.
Number: The index has the data type “number” or “number range” (“Number” or “Number-Range”). If the index is filled through OCR an additional filter can be activated.

Additionally, a number range can be defined (e.g. 10-99)

Date: The value entered in the job is of the “Date” data type (“Date”). The default value is dd.MM.yyyy for German-speaking countries and yyyy-MM-dd for English-speaking countries.
- dd – day – double digit with leading zero
- MM – Monthly double-digit with leading zero
- yyyy – year – four digits with leading zero


Using the gear next to the input field for the date, select the desired date via a calendar. BCS-2 stores the selected date in the index.
Time: The index has the data type “Time”.
Date and time: The index has a data type of DateTime.
Option list: Allows you to select the index value from a drop-down list.

You create the drop-down list at the bottom of the form.
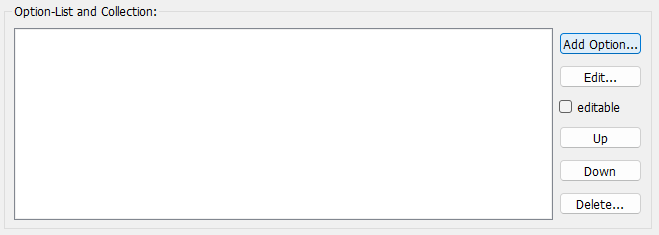
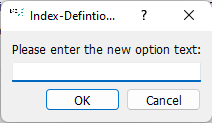
Use the “Add option” button to add a value to your option list, the “Edit…” button to edit a previously selected option and the “Delete…” button to remove the selected option value from the list.
BCS-2 displays the stored option values in the order created. By clicking on the “Up” or “Down” buttons, you can rearrange a previously selected option in the list. Activating the option “editable” allows users to add their own entries.
Map: BCS-2 requires the key table to work with MyBib eL workflows.
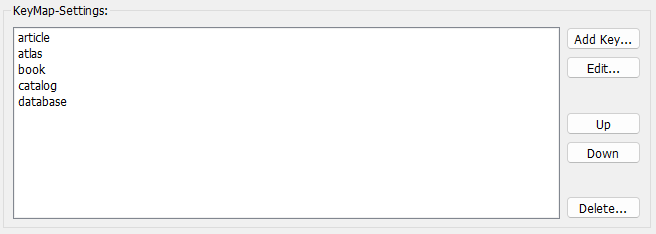
You can create a new key value for the key table using the “Add key” button.
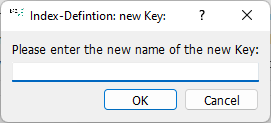
The key name must match the later name in the Metadata.XML file.
For the creation of MODS or Marc 21 XML files with defined abbreviations and codes, the use and adaptation of index types stored in BCS-2 is recommended.
To map existing indexes with those in BCS-2, configure the metadata supply. The sources are:
- CSV files
- XML queries

By clicking on the button “Configure Meta-Data Supply”, BCS-2 opens the form for setting up metadata access.
3.5 CSV Fileadd section
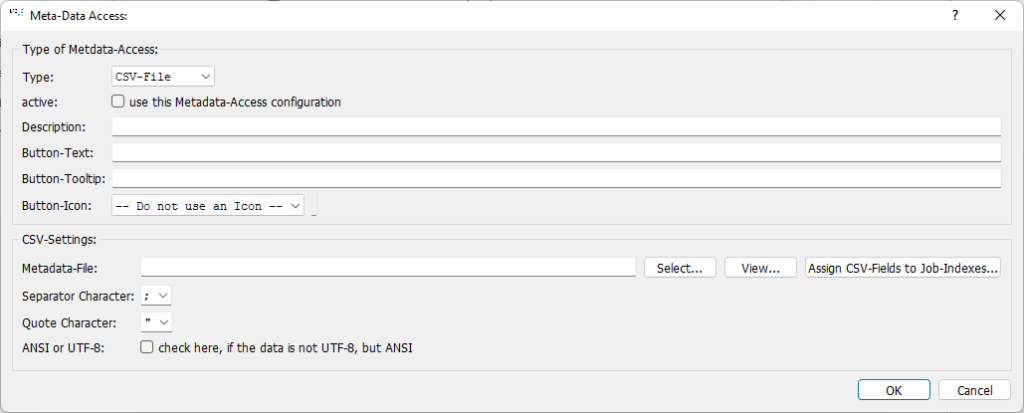
Type: Select the source of the metadata supply from the “Type” drop-down list.
active: BCS-2 uses the metadata supply only after checking the checkbox “Use this Metadata-Access configuration”. After activation, BCS-2 displays the index in turquoise.
Description: A short explanation of the index.
Button-Text: Text, that BCS-2 displays on the button.
Button-Tooltip: Text for the tooltips displayed by the button when hovering.
Button-Icon: Choose the icon for your button.
Select: Selection of the CSV file.
View: BCS-2 displays the file.
Assign CSV-Fields to Job-Indexes: BCS-2 opens the form “Assign column to index”.
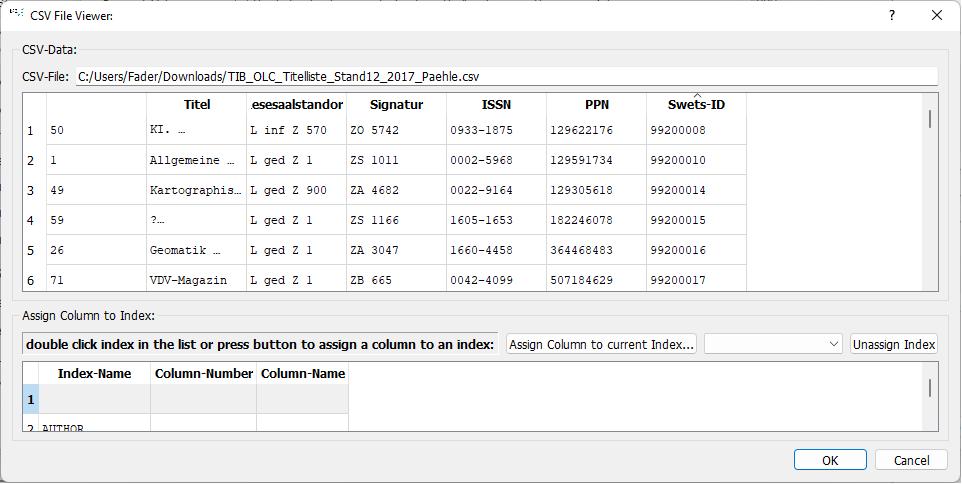
The window is divided into two parts. BCS-2 displays the file name and the CSV file, in the lower part the defined job indices. For the assignment, select the column to be assigned from the drop-down list to the right of the “Assign column to current index” button and assign it to the index by clicking on that button. Alternatively, the assignment can also be made by double-clicking on the index name. The column number determines the order of assignment. Please note that the order in the assignment table corresponds to the order of the columns in the CSV file. Otherwise there will be incorrect assignments when calling the “Job Index Edit Dialogue”.
Separator Character: Separates the data from each other.
Quote Character: Separates the records from each other.
ANSI or UTF-8: Select the encoding for the CSV file here.
BCS-2 automatically transfers the contents of the columns to the previously defined index fields. This access index is highlighted in the input form of the job indexes (green and bold).
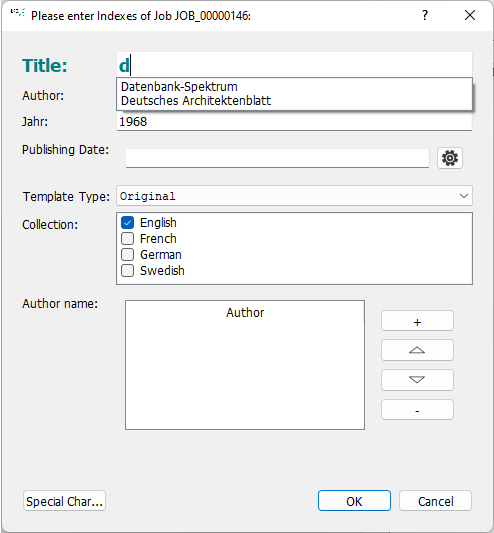
To transfer the column contents of a CSV file, enter the first letters of the index you are looking for in the access index field. BCS-2 dynamically generates a list of entries that match the previous input. After selecting the index, BCS-2 loads the record and populates the indexes.
3.6 XML Queriesadd section
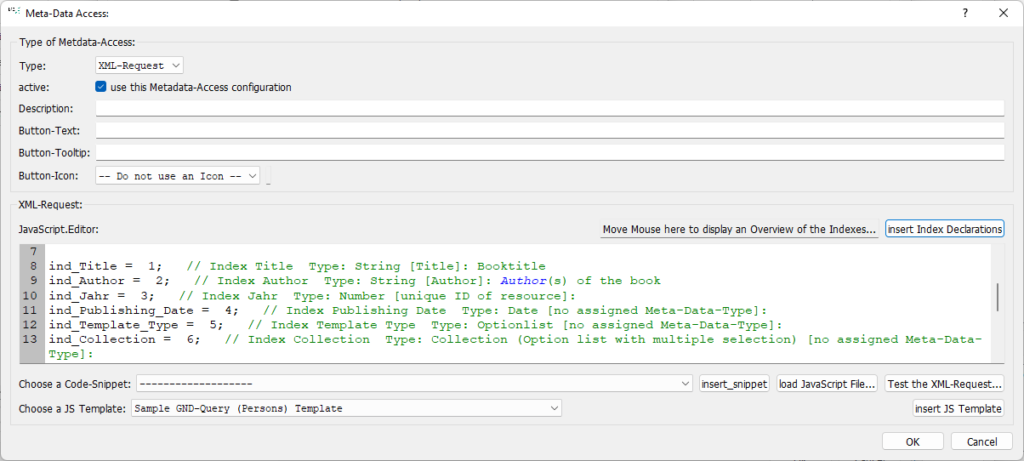
If you enable the XML query type, BCS-2 displays the metadata access form with a JavaScript editor. A number of ready-made XML queries are now available for you to use. By clicking on the “Insert JS template” button, you accept the template selected via the “Select a JS template” drop-down list. Note that you have to adapt the templates for use in workflows to the same, e.g. the mapping of job index to job number. Use the “Test XML access” button to check whether the script is working properly.